TypeScript CRUD API using NestJS, Mongoose, MongoDB, docker and Docker Compose
Here is a step-by-step procedure from scratch that will guide through the process of creating the APIS and dockerize the project
👋 Hi, I Am Francesco
I am a Computer Scientist interested in Web3 and DevRel.
I worked from 2017 to 2020 on the Copernicus project for the ESA European Space Agency as a Fullstack Developer.
Docker Captain
I have interviewed 195+ Developers on my YouTube Channel
I am a Developer Advocate at daily.dev
I have founded 4C, a community focused on Content Creation.
In this article, we will set some CRUD API using:
- NestJS (NodeJS Framework)
- Mongoose (ODM that helps you to create a Schema based on the Model)
- MongoDB (NoSQL Database)
- Docker (Platform to deploy applications using containers)
GitHub Repository: https://github.com/FrancescoXX/nest-docker
Prerequisite: NodeJs installed, Docker (Docker desktop on windows/Mac Machines, Docker installed natively on Linux)
But you can follow way better if you:
- Know how to run a "hello world" application using NestJS
- Know what MongoDB Atlas is and how it works
- Have an idea of what Mongoose is
- Know what a Dockerfile and a Dockerfile is
NestJS

NestJs is a Node.js framework for building efficient and scalable applications, with full support to Typescript. It has a CLI you can use to generate projects and block easily and It uses express under the hood but has many interesting features like the building blocks:
- Modules
- Providers
- Controllers
- Services
Mongoose
Mongoose is an ODM (Object Data Modeling) javascript library for MongoDB and Node.
It is used to manage data relationships, uses Schemas and helps you to connect to a mongo db using mongo DRIVER
MongoDB

MongoDB is a NoSQL database. It stores documents and by using a Json-like object structure it's very easy to use with a Node application
In this example, we will use MongoDB Atlas, which is a cloud solution and it's perfect for an example. But of course, we could use it locally, even better if inside a docker container.
DOCKER

Docker is a platform to build run and share application using the idea of containers. If you want a brief introduction, here is a short video
https://youtu.be/eN_O4zd4D9o
Project Setup
Install NestJS CLI
NestJS comes with an easy to use CLI, that you can install globally (or locally) and it helps you to get started and use NestJS
npm install -g @nestjs/cli
Create a new nest project (a new folder will be created)
nest new nest-mongo-docker
Open the project with your favorite IDE. If you have VS Code, you can type
code nest-mongo-docker
Install dependencies
npm install mongoose @nestjs/mongoose
To check if it's running, just type
nest start
And check localhost:3000
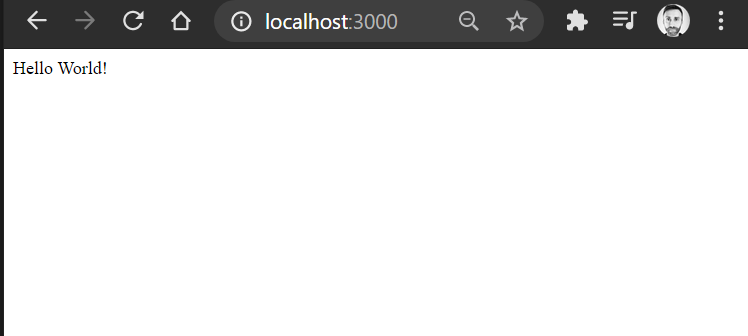
If you see something like that, you can keep going :)
From the '/nest-mongo-docker' folder, using the nest CLI, we can generate files for the resource we want to create:
- a controller
- a service
- a module
nest generate controller users
nest generate service users
nest generate module users
in the src/users folder and let's create a user.module.ts file. From the command line, you can type:
touch src/users/user.model.ts
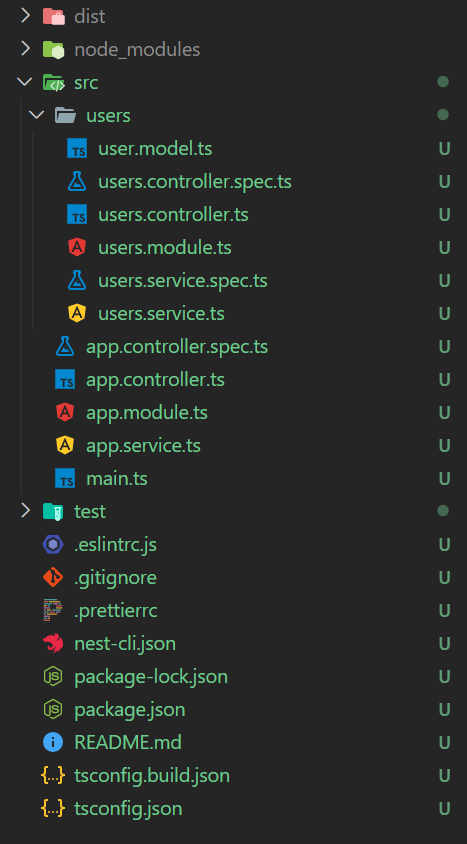
Our project structure should look like this:
Model
in the users.model.ts, we can create a model for the resource we want to use. We will use a 'user' resource, with name, surname, and points, of the type string, string, and number respectively. Please note that here we are not using Typescript types, but plain JavaScript ones.
We don't need to add the "id" primary key in the schema, because it will be generated by Mongoose
import * as mongoose from 'mongoose';

export const UserSchema = new mongoose.Schema({
  name: { type: String, required: true },
  surname: { type: String, required: true },
  points: { type: Number, required: true },
});

export interface User extends mongoose.Document {
  id: string;
  name: string;
  surname: string;
  points: number;
}
Service
We will use a Nest Service, which will be called by the controller functions.
Using the Mongoose library, we can easily work with objects in the Mongo Database
We can also import "NotFoundException" to have better error Handling in our application.
users.service.ts
import { Injectable } from '@nestjs/common';
import { InjectModel } from '@nestjs/mongoose';
import { Model } from 'mongoose';
import { User } from './user.model';

@Injectable()
export class UsersService {
  constructor(@InjectModel('User') private readonly userModel: Model<User>) {}

  /**
   * Create a new user
   * @param name
   * @param email
   * @param password
   */
  async create(name: string, email: string, password: string): Promise<User> {
    const createdUser = new this.userModel({ name, email, password });
    return createdUser.save();
  }

  /**
   * Find all users
   */
  async findAll(): Promise<User[]> {
    return this.userModel.find().exec();
  }

}
Controller
Let's work on the Controller. NestJs forces us to create a solid structure for our HTTP requests, and it uses decorators for HTTP verbs.
We will create 2 endpoints
- Get All Users
- Create a new User (a Post request passing the new users value in the body)
in the users.controller.ts
import {
  Controller,
  Post,
  Body,
  Get,
  Param,
} from '@nestjs/common';
import { UsersService } from './users.service';

@Controller('users')
export class UsersController {
  constructor(private readonly usersService: UsersService) {}

  @Post()
  async createOneUser(
    @Body('name') name: string,
    @Body('email') email: string,
    @Body('password') password: string,
  ) {
    const generatedId = await this.usersService.createOneUser(
      name,
      email,
      password,
    );
    return { id: generatedId };
  }

  @Get()
  getAllUsers() {
    return this.usersService.getAllUsers();
  }
Module
The UsersController and UsersService can be imported as a Module, and in this Module we can define some environment variables, to define the connection with the Mongo DB:
- MONGO_ATLAS_USER
- MONGO_ATLAS_PASSWORD
- MONGO_ATLAS_DB
You can change this, and they must match the user and password you have on The MongoDB ATLAS
in the users.module.ts
import { Module } from '@nestjs/common';
import { MongooseModule } from '@nestjs/mongoose';
import { UserSchema } from './user.model';
import { UsersController } from './users.controller';
import { UsersService } from './users.service';

@Module({
  imports: [
    MongooseModule.forFeature([{ name: 'User', schema: UserSchema }]),
  ],
  controllers: [UsersController],
  providers: [UsersService],
})
export class UsersModule {}
in the app.module.ts
import { Module } from '@nestjs/common';
import { AppController } from './app.controller';
import { AppService } from './app.service';
import { UsersModule } from './users/users.module';
import { MongooseModule } from '@nestjs/mongoose';

@Module({
  imports: [
    UsersModule,
    MongooseModule.forRoot(
      //Replace this line with the one Cluster > Connect > Connect your Application
      `mongodb+srv://${process.env.MONGO_ATLAS_USER}:${process.env.MONGO_ATLAS_PASSWORD}@cluster0.suflu.mongodb.net/${process.env.MONGO_ATLAS_DB}?retryWrites=true&w=majority`,
    ),
  ],
  controllers: [AppController],
  providers: [AppService],
})
export class AppModule {}
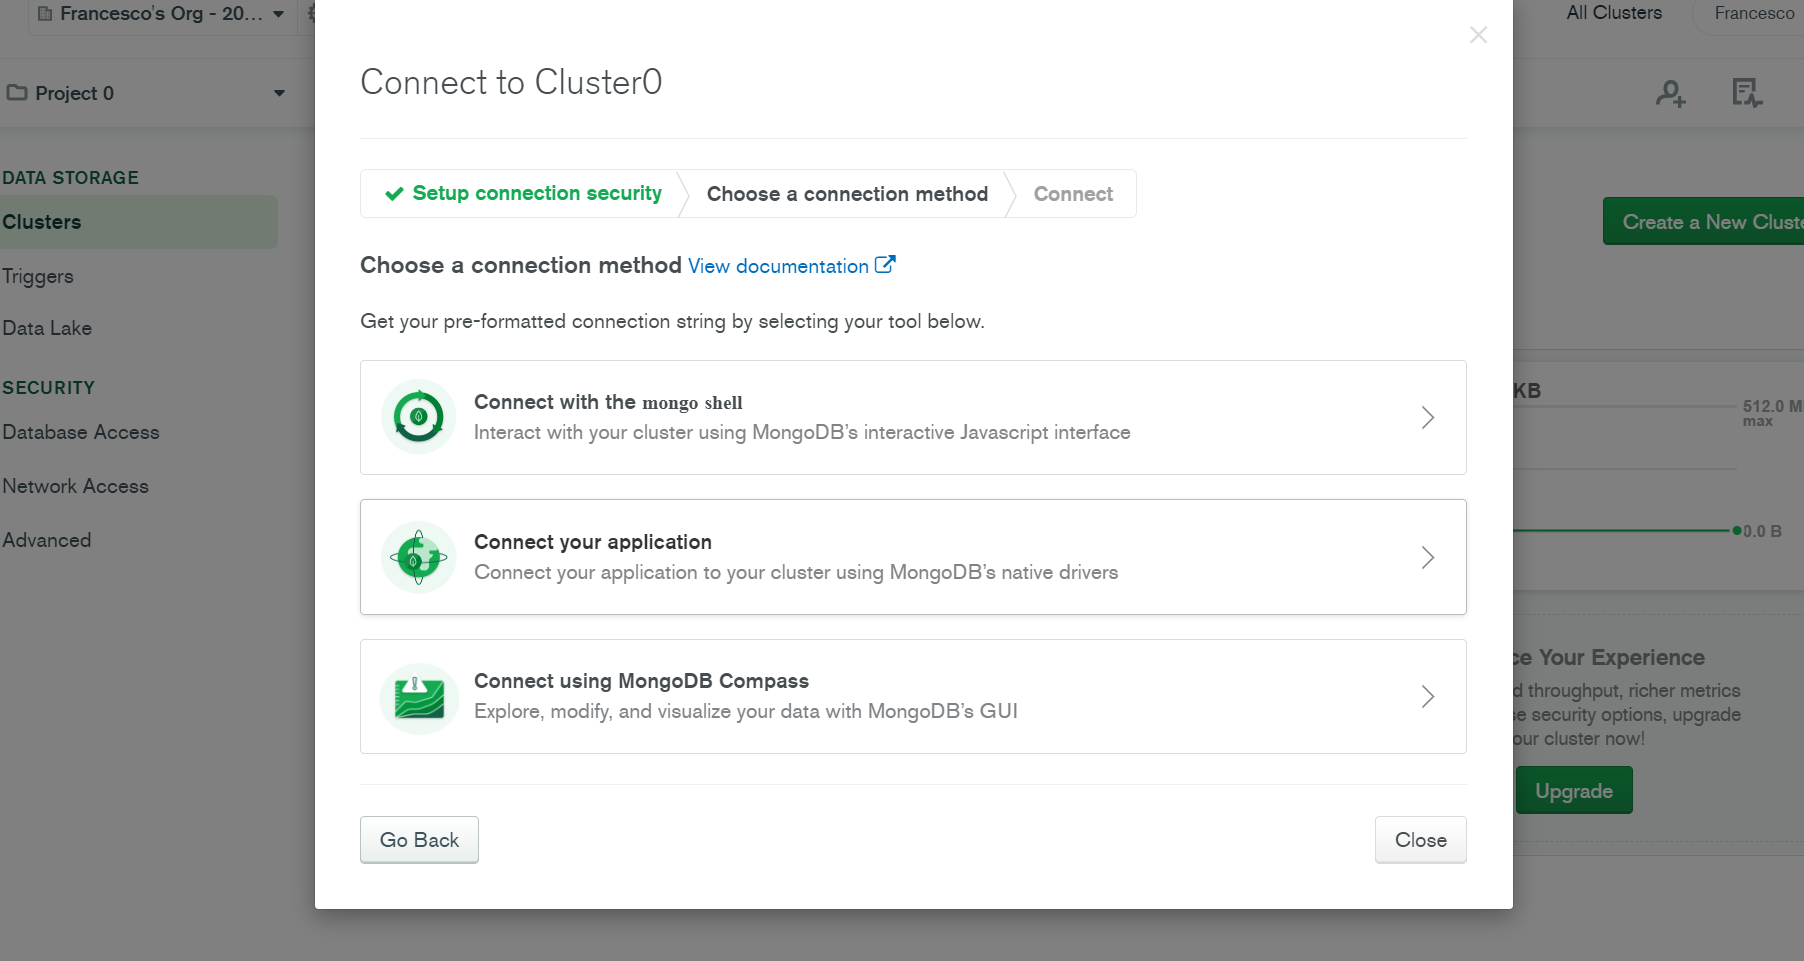
Remember to replace the line inside the forRoot method accordingly to your application.
To check that, go to Atlas DB site, Cluster > Connect > Connect your application, and copy the line below.
replace username, password and database using JavaScript Template literal. This is useful to pass the values from env variable instead of hardcoding them here.
ATLAS DB Setup
https://www.mongodb.com/cloud/atlas/lp/try2?utm_source=google&utm_campaign=gs_emea_italy_search_brand_atlas_desktop&utm_term=mongodbatlas&utm_medium=cpc_paid_search&utm_ad=e&utm_ad_campaign_id=1718986540&gclid=EAIaIQobChMI7-GGl6mq7gIVFbd3Ch2hogE3EAAYASAAEgKNVPD_BwE
DOCKER
let's create 3 files to containerize our nest js application
Dockerfile
FROM node:14

RUN npm i -g @nestjs/cli

COPY package.json .

RUN npm install

COPY . .

EXPOSE 3000

CMD ["nest", "start"]
Please note the 3rd line:
This is specific to NestJs, and we need to add this one in order to operate with the Nest CLI inside the container
the .dockerignore
node_modules
dist
.git
.vscode
The docker-compose.yml
#docker-compose file
version: '3'

services:
  nestapp:
    container_name: nestapp
    image: nestapp:1.0.0
    build:
      context: .
      dockerfile: Dockerfile
    ports:
      - "3000:3000"
    env_file:
      - .env
the .env file:
Replace the XXXXX with your MongoDB Atlas User and Password
MONGO_ATLAS_USER=XXXX
MONGO_ATLAS_PASSWORD=XXXXXX
MONGO_ATLAS_DB=nest-mongo-docker-db
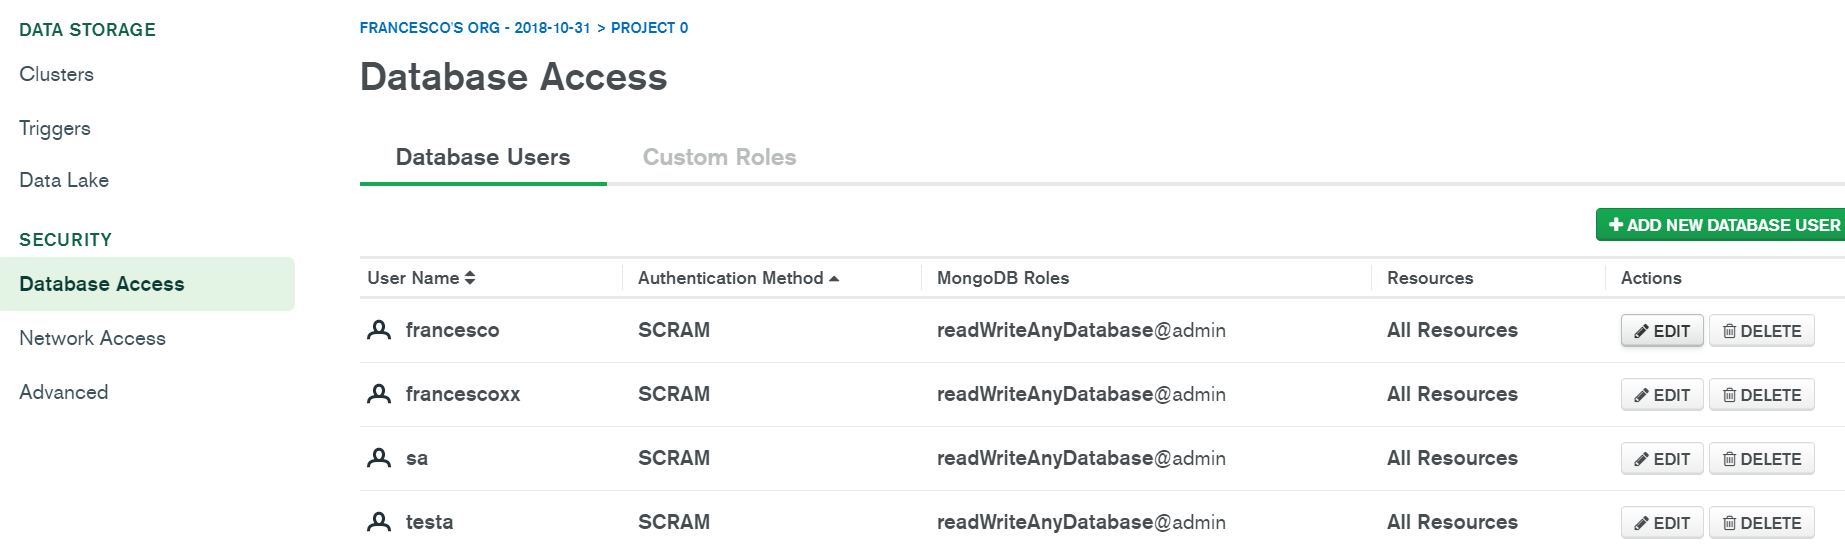
Replace with your password in MongoDB ATLAS.
You can find it on Atlas Site, under "Database Access"
Also replace the "image" value with something like:
docklerhubuser/nest-mongo:0.0.1
time to run our application
docker-compose up -d --build nest_mongo_backend
check if the app is up and running using
docker ps

POSTMAN / MONGODB ATLAS

We will use Postman, but you can use a whenever tool you want
let's make a GET request like this
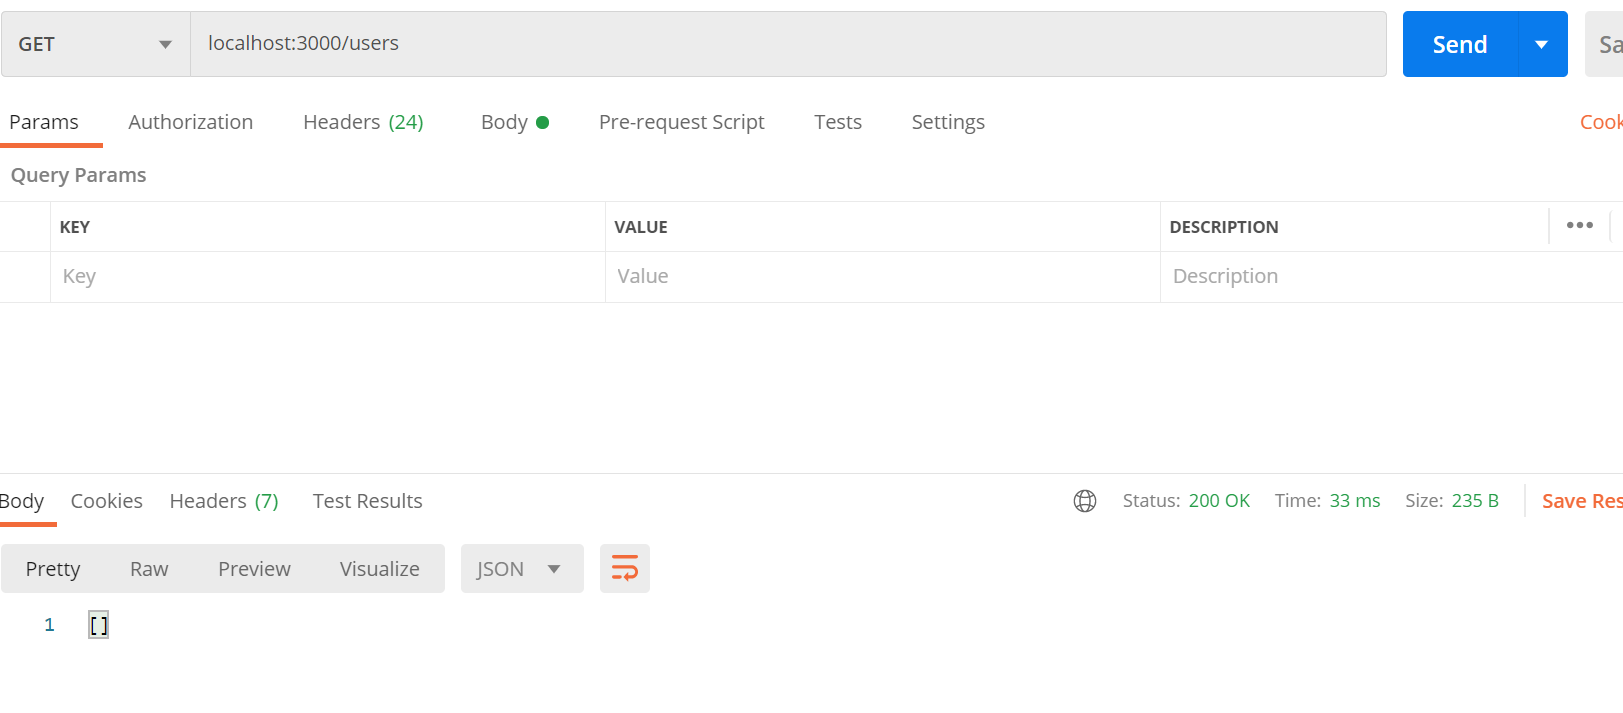
our users are empty.
We can confirm this by checking on Mongo Atlas
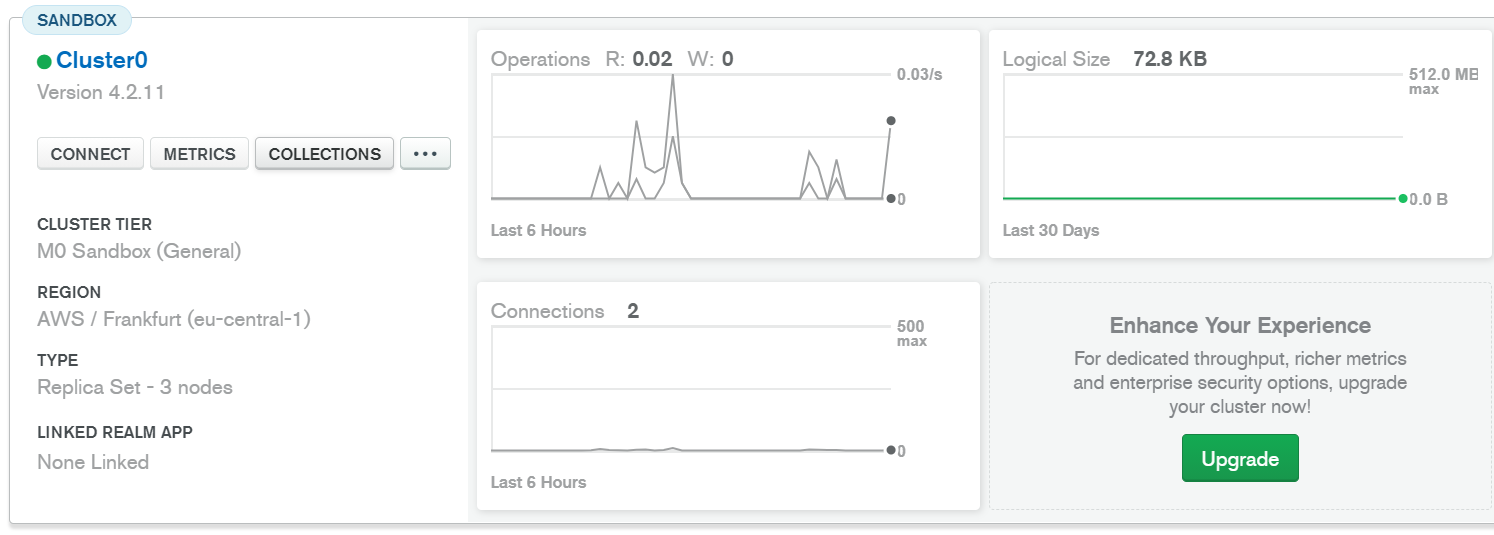
Click on "Collections"
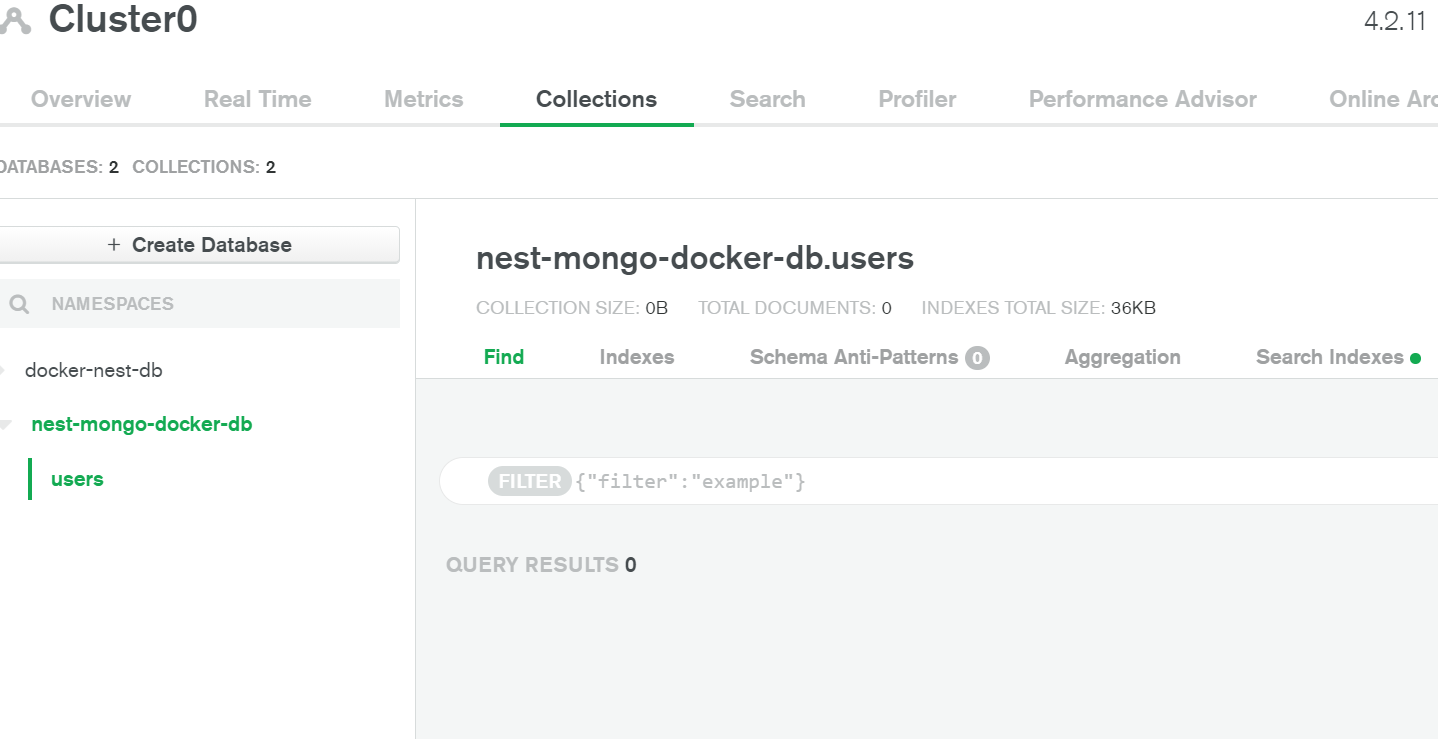
As you can see, the users list is empty
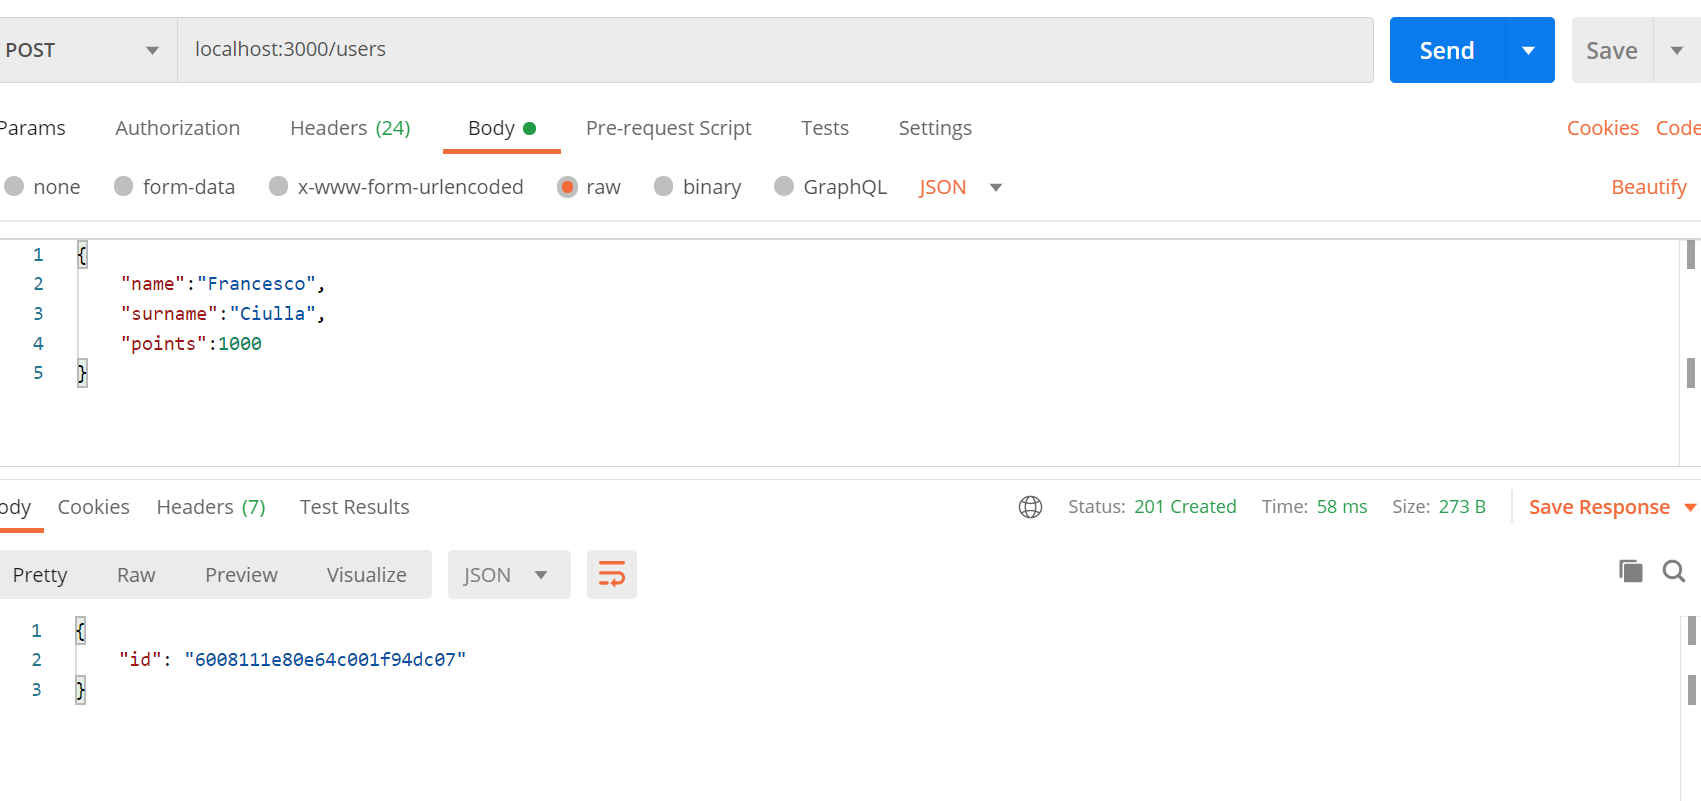
Let's create 3 users with a POST request, using POSTMAN. Here is an example of one of the 3
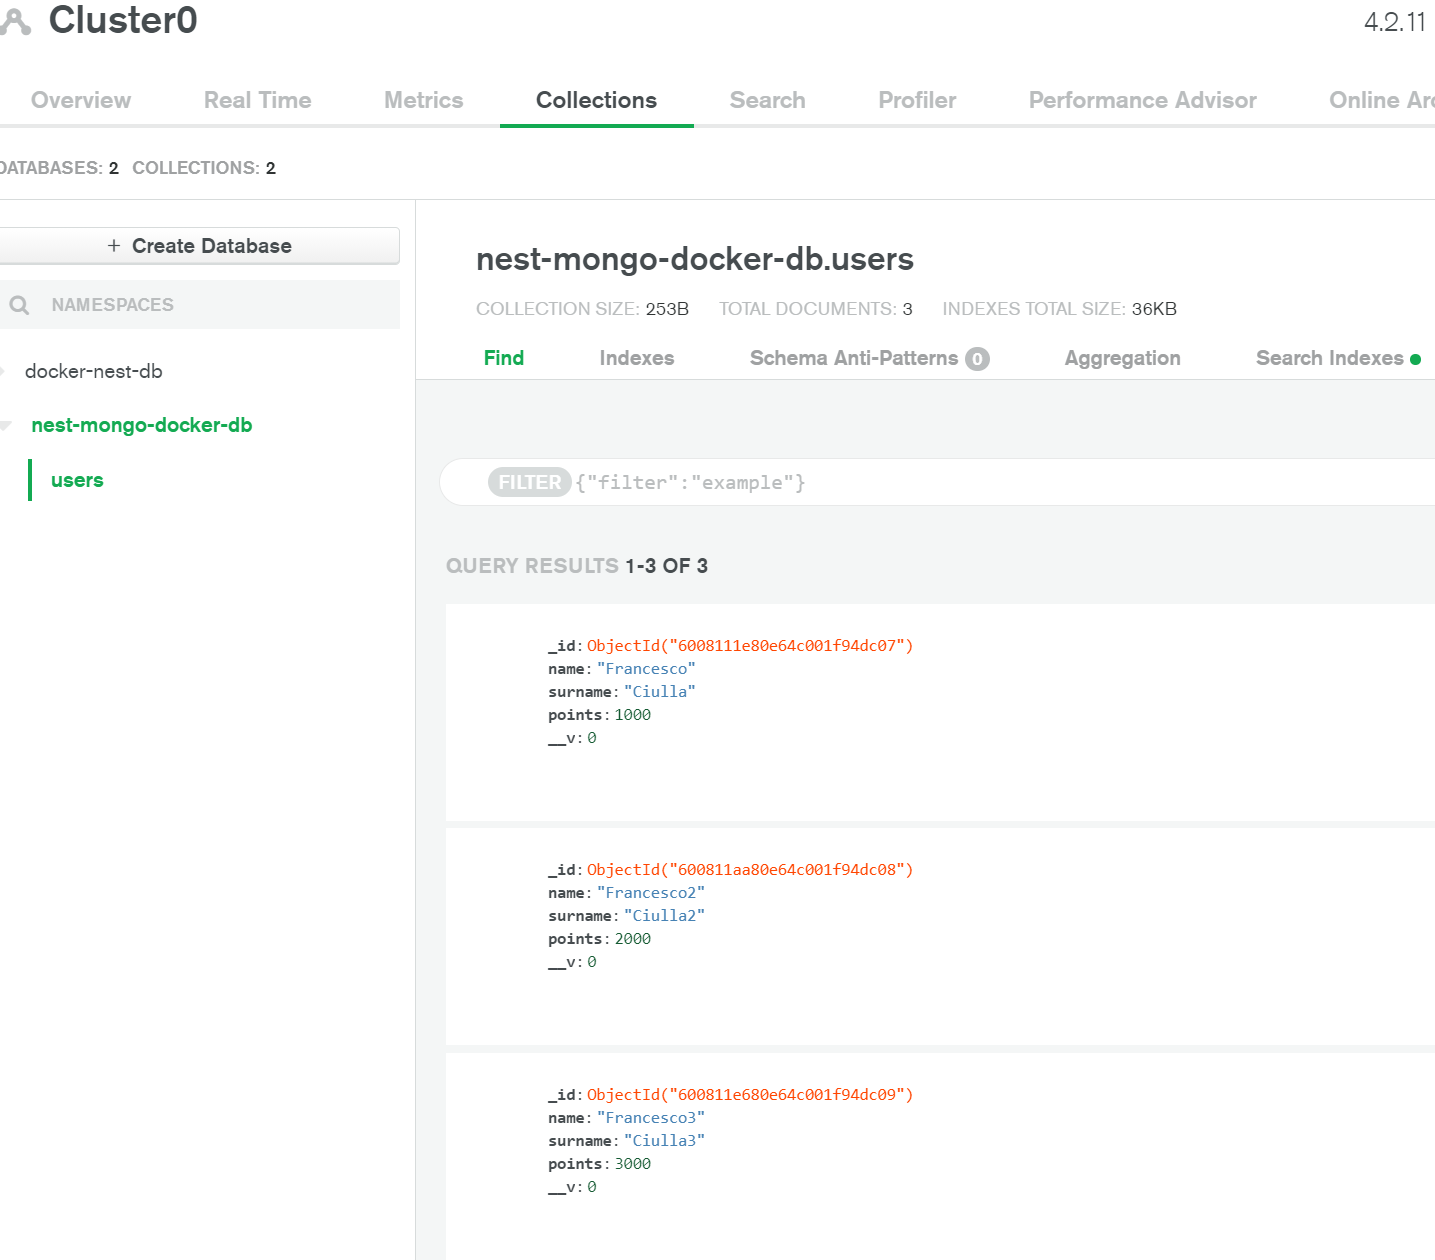
Let's check again if we have new users

Let's check on Atlas
GitHub Repository: https://github.com/FrancescoXX/nest-docker
That's all. If you have any question, drop a comment below.