JavaScript CRUD REST API using Node.js, Express, HarperDB, Docker
A step-by-step procedure from scratch that will guide you through the process of creating the APIS and dockerize the project
👋 Hi, I Am Francesco
I am a Computer Scientist interested in Web3 and DevRel.
I worked from 2017 to 2020 on the Copernicus project for the ESA European Space Agency as a Fullstack Developer.
Docker Captain
I have interviewed 195+ Developers on my YouTube Channel
I am a Developer Advocate at daily.dev
I have founded 4C, a community focused on Content Creation.
Prerequisites:
- Docker installed on the machine
- Node.js and npm installed on the machine
- A tool to test APIs (like Postman)
- HarperDB Studio Account (free)
You can create a free HarperDB Studio Account here: https://studio.harperdb.io/sign-up
CRUD is simply an acronym used to refer to four basic operations that can be performed on database applications:
- Create
- Read
- Update
- Delete
In this article, we will set CRUD API using:
- Node.js (JavaScript Runtime Engine)
- Express
- HarperDB
- Docker
NODE.js

Node.js is a back-end JavaScript runtime environment, which means briefly that can execute JavaScript code on a computer, for example, yours or the one where Node.js is installed. The good thing is that, by having Docker, you DON't actually need to install it, because we will use the Node.js image, and so we can also avoid versioning between my version of Node.js installed on my machine and yours
EXPRESS

Express is a minimal and flexible Node.js web application framework that provides a robust set of features for web and mobile applications.
HarperDB
HarperDB is a full-featured data management platform that runs from edge to cloud, and anywhere in between.
You can create a free account here https://studio.harperdb.io/sign-up
The good news is that you don't need to pay to test it, but I suggest you try it out if you need more resources
DOCKER

Docker is a platform to build run and share applications using the idea of containers. If you want a brief introduction, here is a short video
STEP by Step guide
HarperDB
HarperDB is a scalable database that's improving app performance and development with solutions like Hybrid Cloud, using a single endpoint!
Its' SQL & NoSQL in one powerful tool, enabling SQL queries on JSON data
It uses a very Intuitive REST API
It removes the need for an ORM by returning the results as JSON arrays
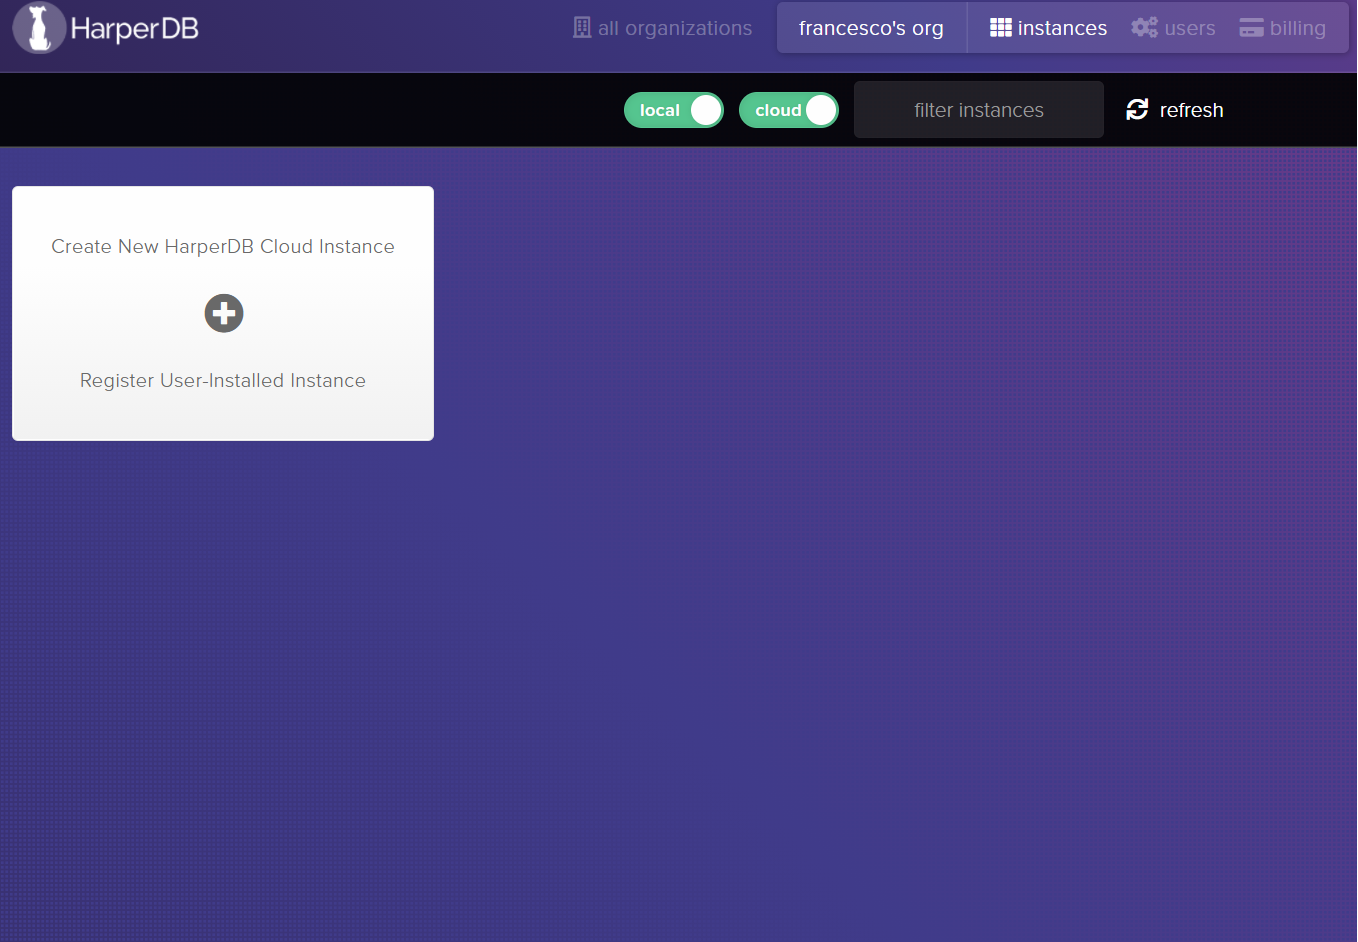
First of all, we need to create our FREE instance of HarperDB, using HarperDB Studio.
It has a simple UI which makes everything easy
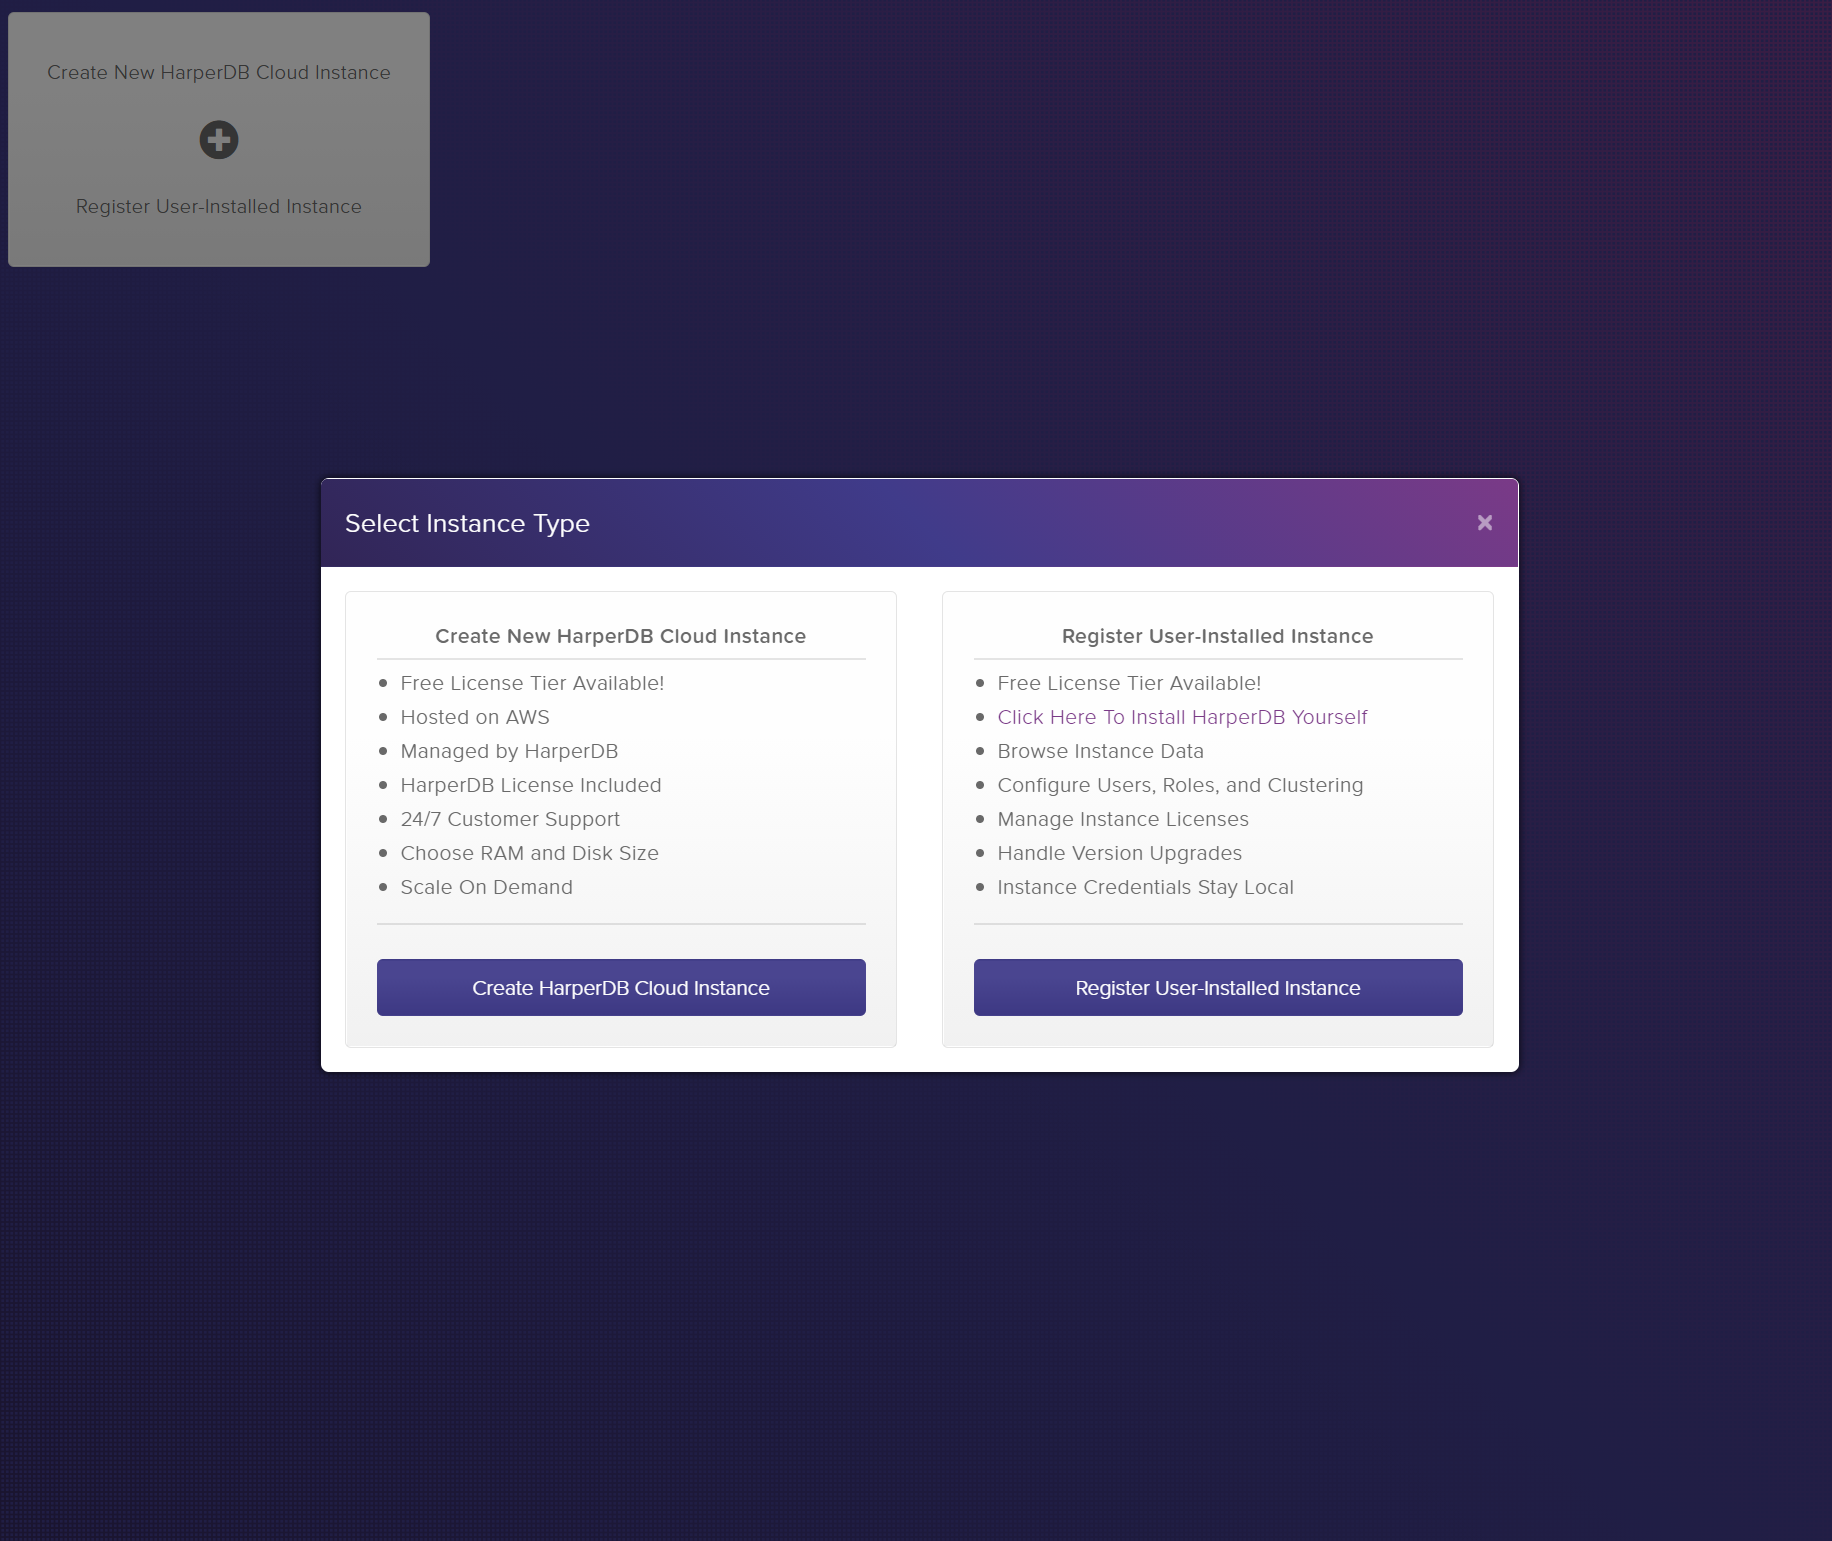
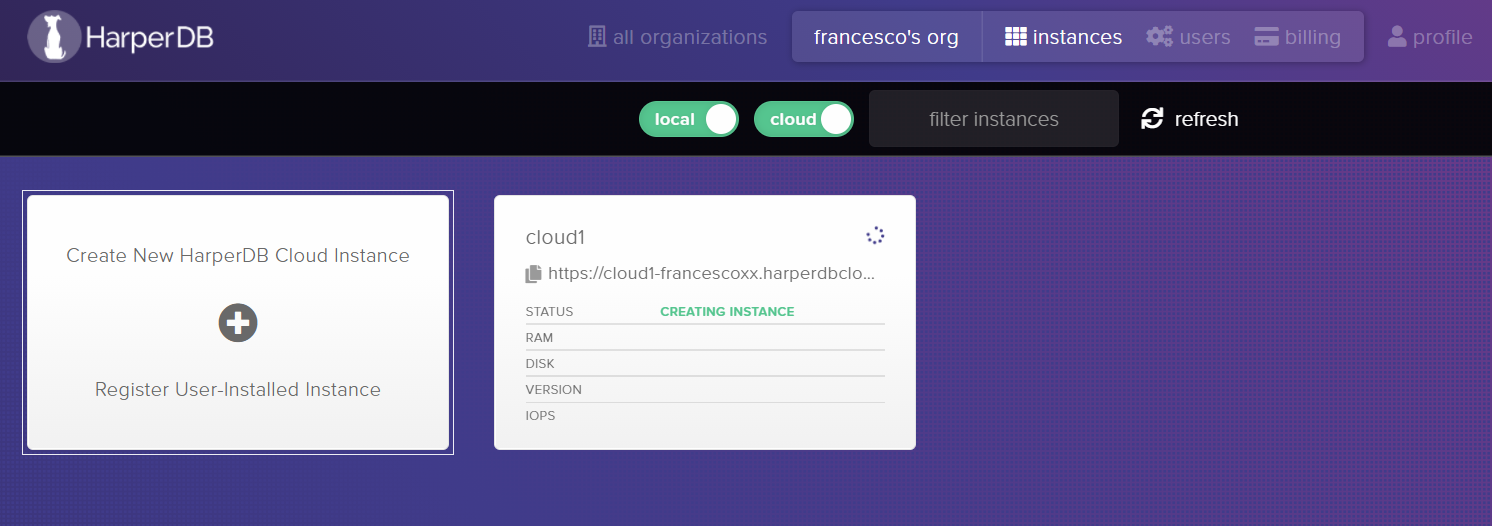
Click on "Create new HarperDB Cloud Instance"
And then on the Create HarperDB Cloud Instance on the left.
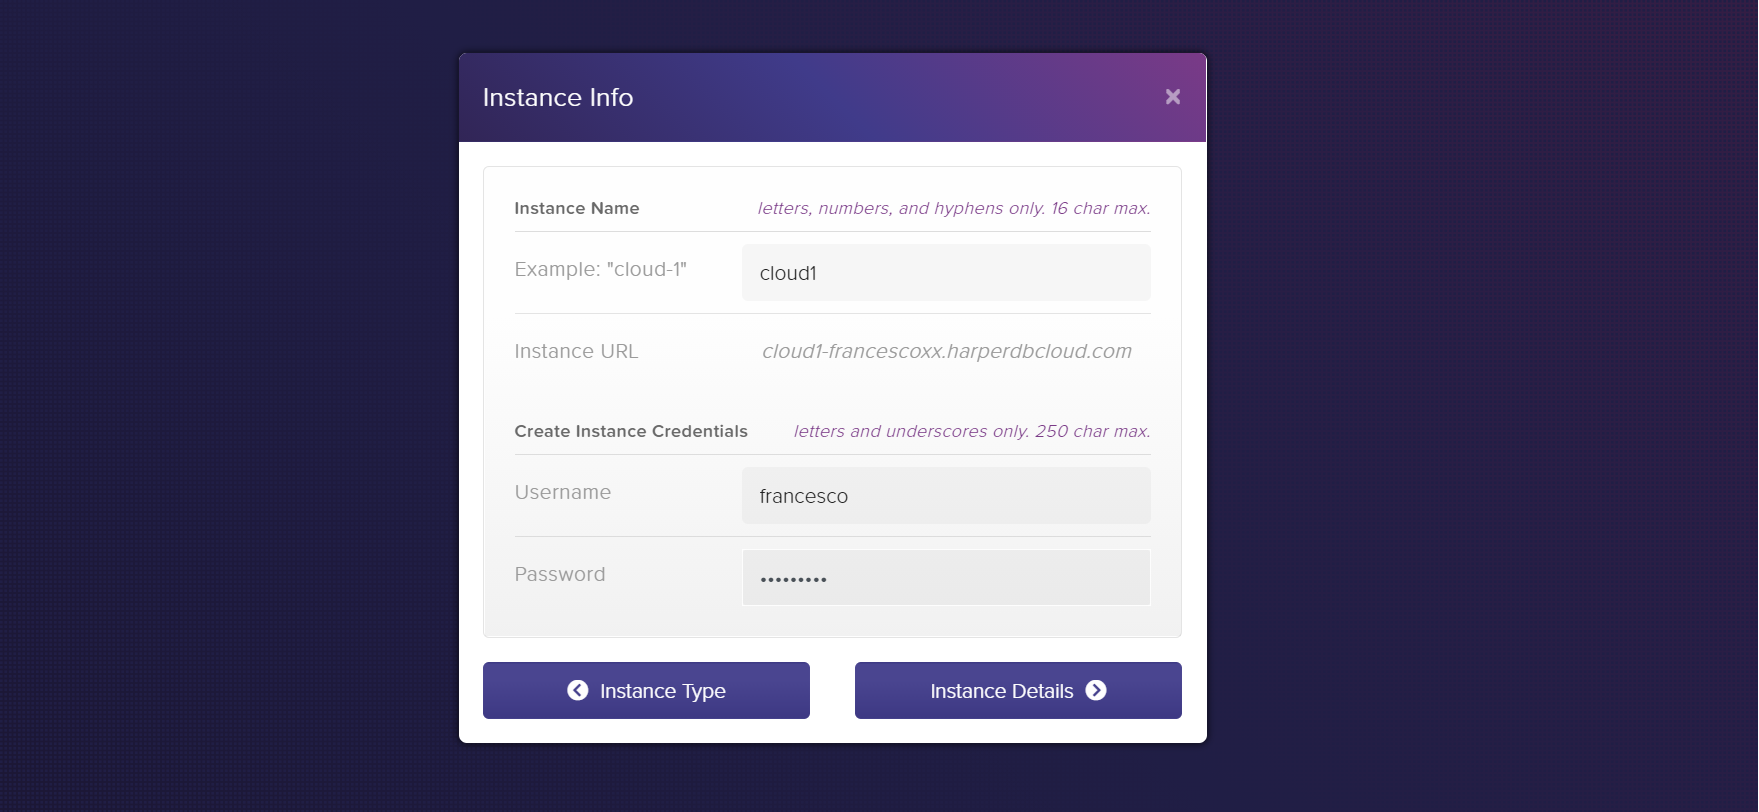
Add username, password, and a name for this instance
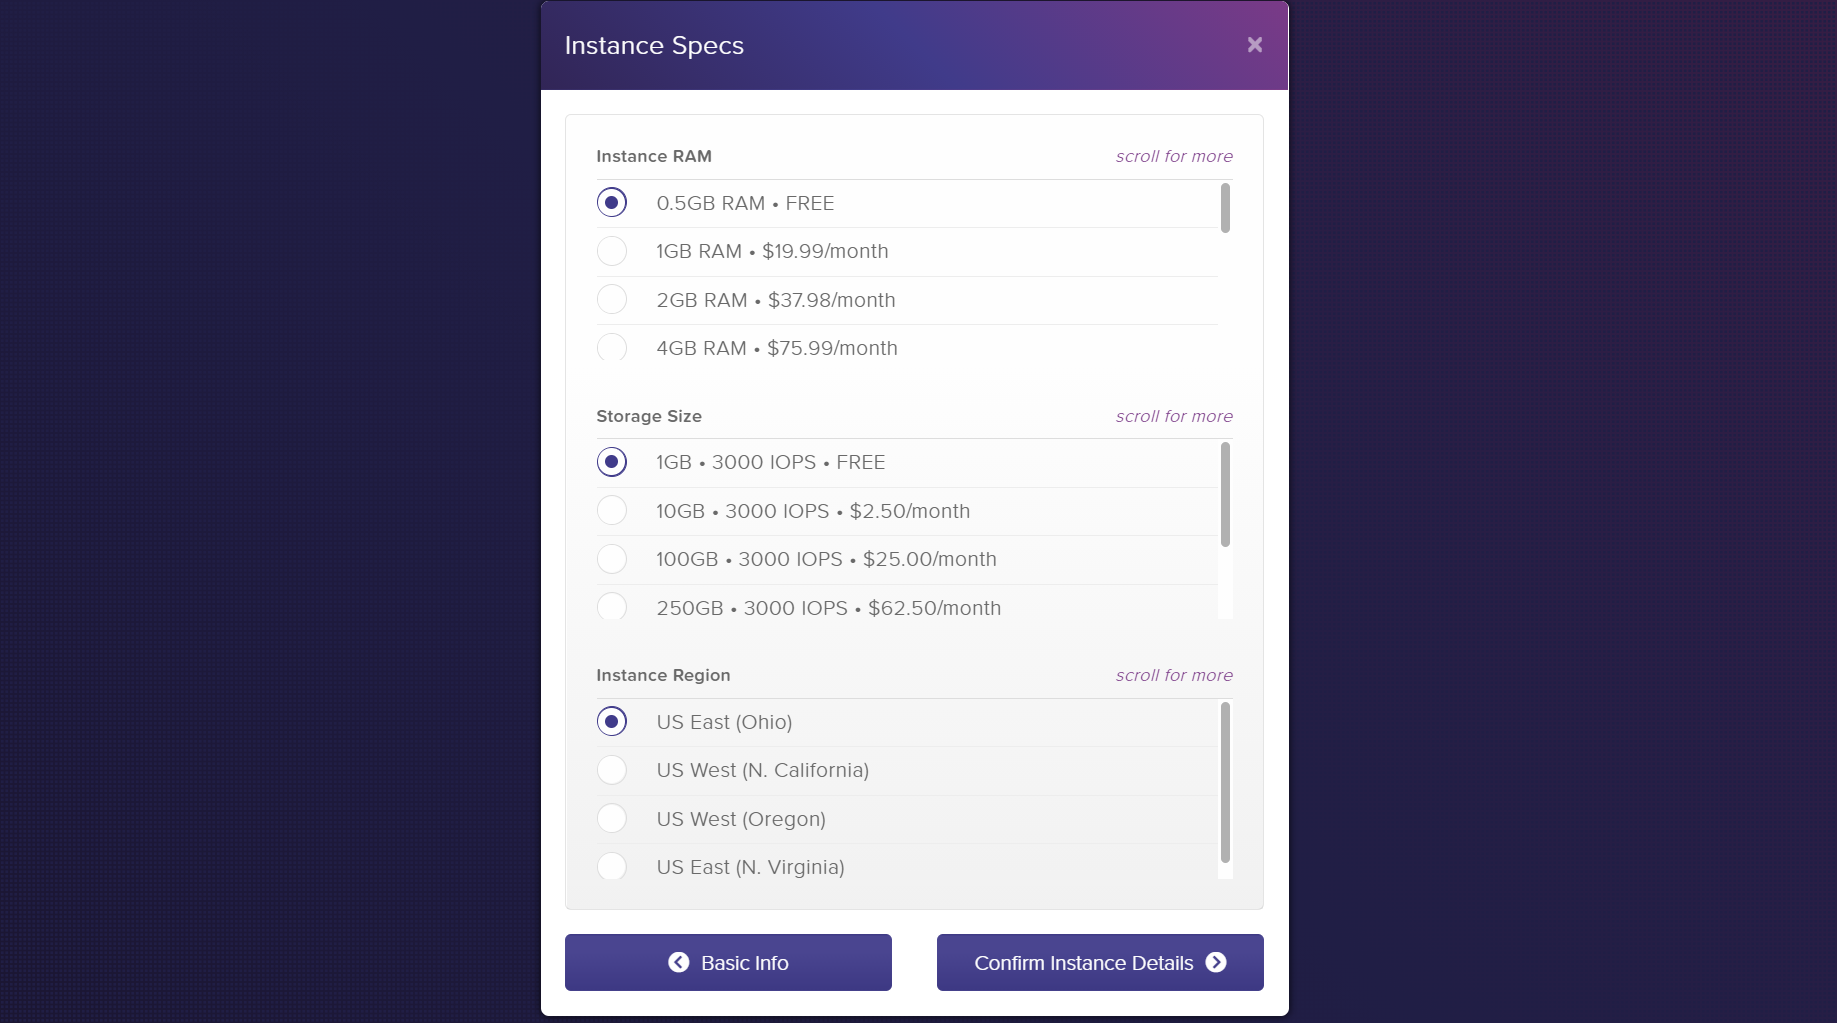
Leave the default FREE values and change Region if you want
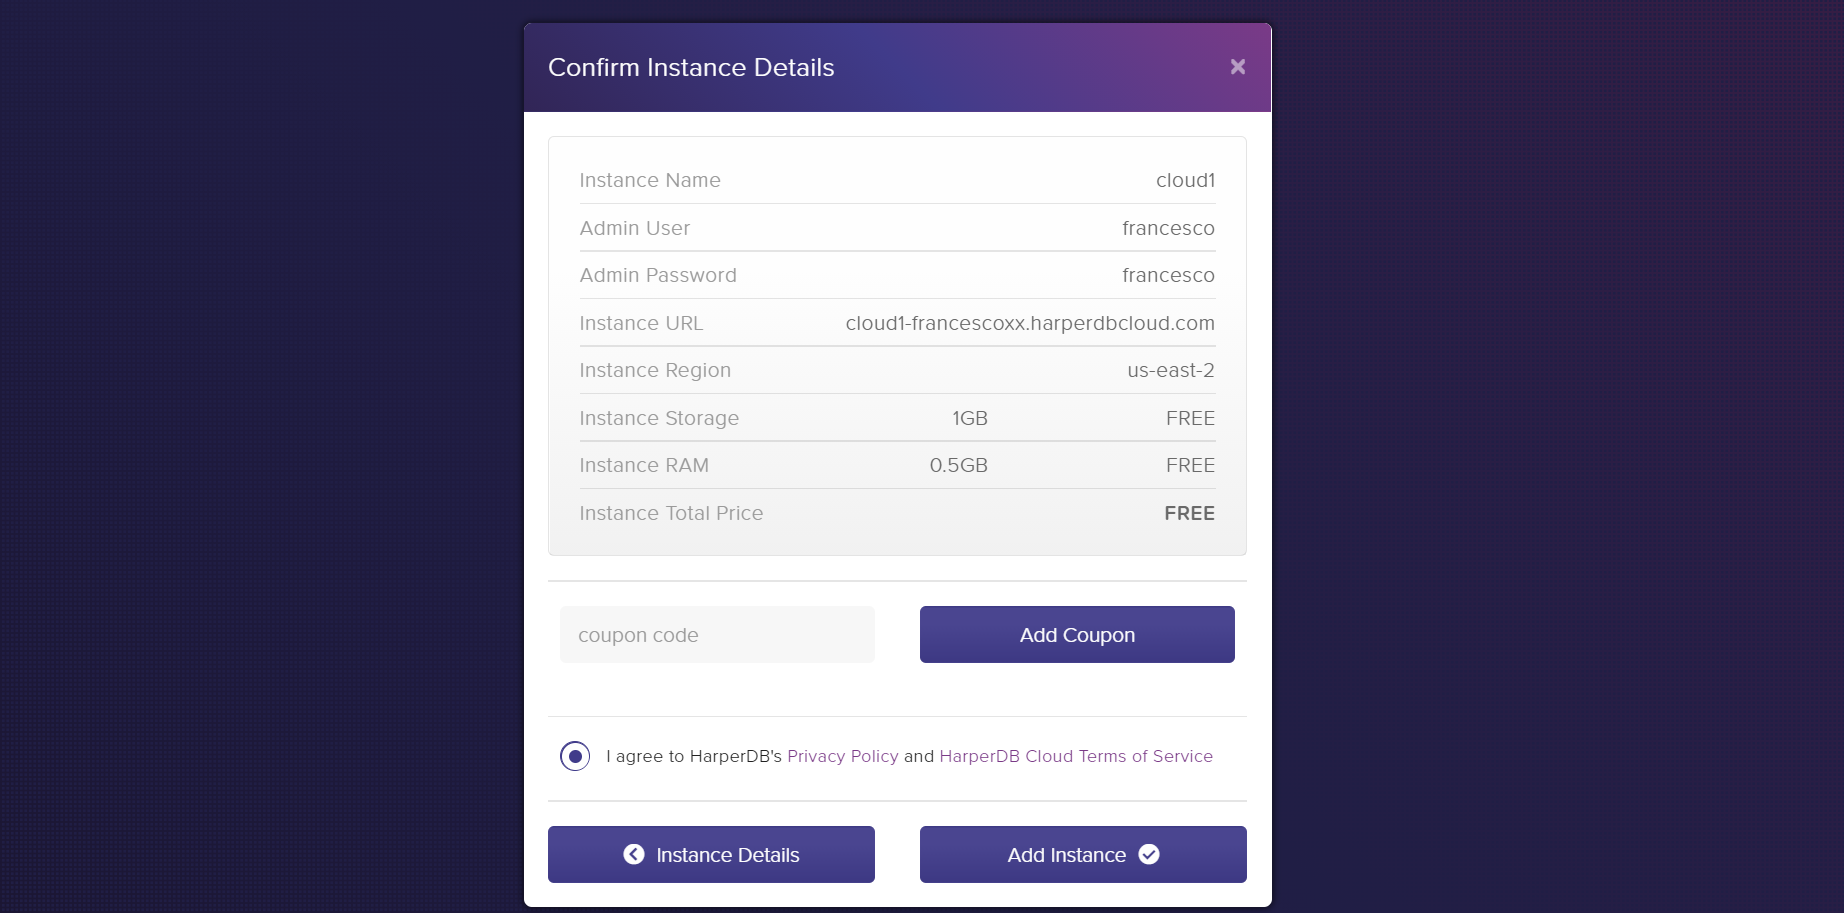
Agree with privacy policy and Terms of Service and finally on "Add Instance"
wait a couple of minutes while your instance is created...

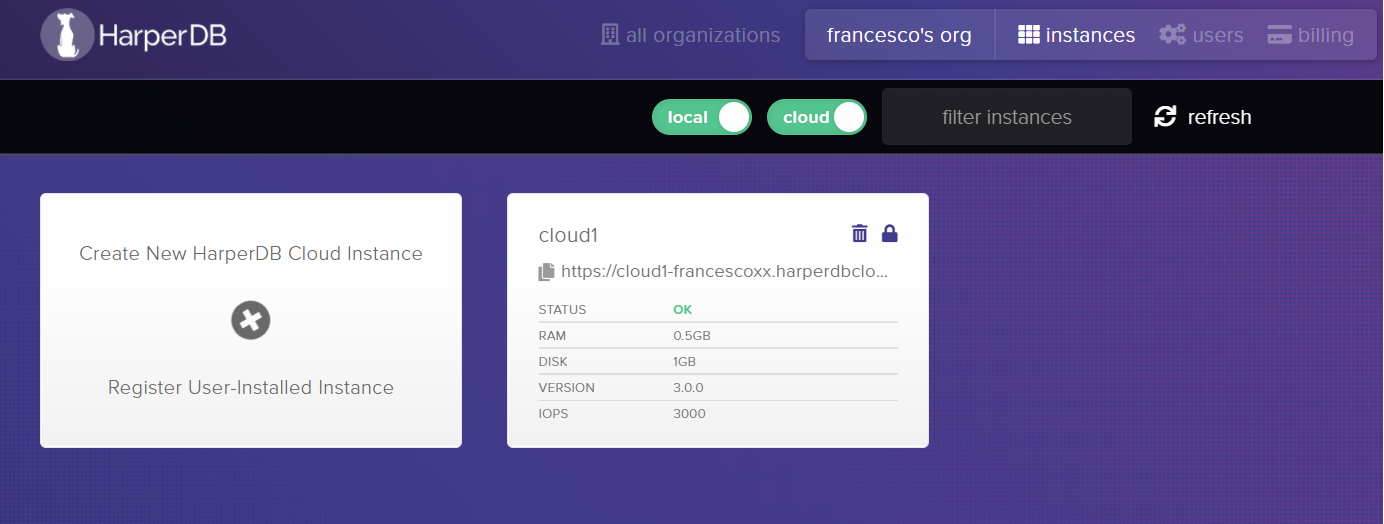
When you see "ok", the instance has been created! Nice!
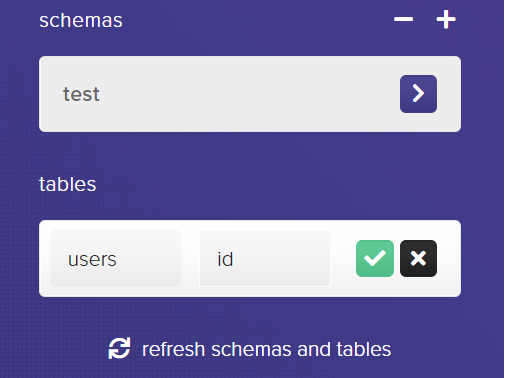
Now click on the instance and let's create a schema and a basic table:
First of all the schema test

And then a table users we will use with our application. Please note that we don't need to add all the value of the columns here, they will be added automatically when needed!

Step by Step guide to create our Node.js Application
0) Create a folder named harperdb-docker and enter into it
mkdir harperdb-docker && cd harperdb-docker
1) Initialize Node.js application using npm
npm init -y
2) Install the dependencies: express and harperive
Harperive is what we need in order to connect our Node.js application to the HarperDB instance
npm i express harperive
3) Create Structure
mkdir app && cd app
mkdir controllers
mkdir routes
mkdir util
4) Then create an index.js file
const express = require('express');

//INITIALIZE APP WITH EXPRESS
const app = express();
app.use(express.json());

//Set proper Headers on Backend
app.use((req, res, next) => {
  res.setHeader('Access-Control-Allow-Origin', '*');
  res.setHeader('Access-Control-Allow-Methods', 'GET, POST, PUT, DELETE');
  next();
});

//ROUTES
app.use('/dev', require('./routes/dev.routes.js'));
app.use('/users', require('./routes/users.routes.js')); //users crud

app.listen(process.env.PORT, () => {
  console.log(`Example app listening at http://localhost:${process.env.PORT}`);
});
5) Inside the util folder, let's create the connection for HarperDB, by creating a database.js file
const harperive = require('harperive');

const config = {
  harperHost: process.env.INSTANCE_URL,
  username: process.env.INSTANCE_USERNAME,
  password: process.env.INSTANCE_PASSWORD,
  schema: process.env.INSTANCE_SCHEMA,
};

const Client = harperive.Client;
const db = new Client(config);

module.exports = db;
6) Create a dev.routes.js file inside routes
This contains just a test endpoint to check if the application is working
const controller = require('../controllers/dev.controllers');
const router = require('express').Router();

router.get('/version', controller.getVersion);

module.exports = router;
7) Create a users.routes.js file inside routes
It will contain the routes and the references to 5 endpoints,
const controller = require('../controllers/' + 'users' + '.controllers');
const router = require('express').Router();

//CRUD Model-Agnostic.
//Keep them at the end of the route file for url parsing requests
router
  .get('/', controller.getAll)
  .get('/:id', controller.getOne)
  .post('/', controller.createOne)
  .put('/:id', controller.updateOne)
  .delete('/:id', controller.deleteOne);

module.exports = router;
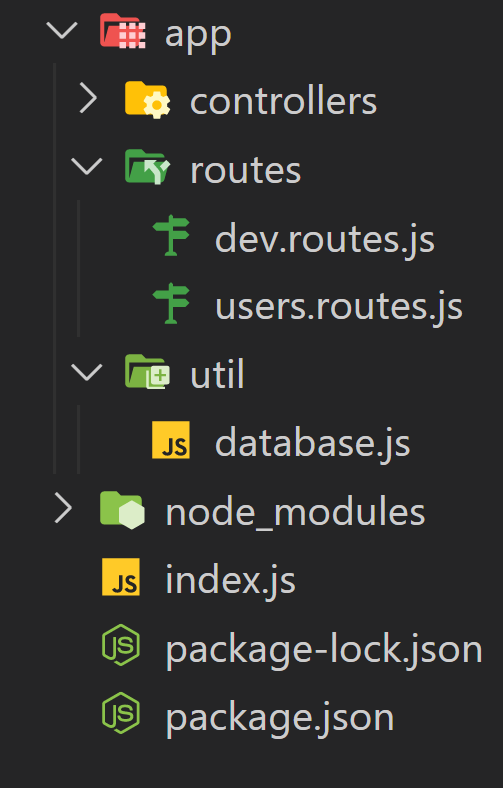
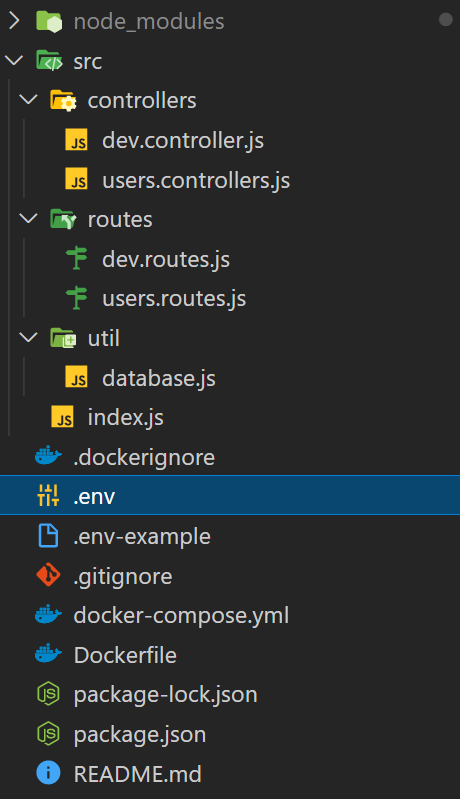
At this point, your structure should look like this:
Controllers
8) The dev.controllers.js file inside controllers' folder. This will be used just to test that our application works, even if we have some problems connecting our backend application to the db instance.
// [GET] ../dev/version
exports.getVersion = (req, res, next) => {
  return res.status(200).json({ 'HarperDB tutorial version': '1.0.0' });
};
9) The users.controllers.js file, located in the controllers folder.
It contains five main methods:
- createOne: To create a new user
- getAll: To Get all the users and return them in an array
- getOne: To get a specific user, by providing id
- updateOne: To update an existing user, providing new values and the id of the user to modify
- deleteUser: to delete an existing user by providing the id
const client = require('../util/database');

/**
 * CRUD CONTROLLERS
 */
const SCHEMA = process.env.INSTANCE_SCHEMA;
const TABLE = 'users';

//CREATE-ONE
exports.createOne = async (req, res, next) => {
  console.log('createOne: [POST] /users/');
  try {
    const user = await client.insert({
      table: TABLE,
      records: [
        {
          username: req.body.username,
          password: req.body.password,
          followers: req.body.followers,
        },
      ],
    });
    res.json(user);
  } catch (error) {
    res.json(error);
  }
};

//GET-ALL
exports.getAll = async (req, res, next) => {
  console.log('getAll: [GET] /users/');

  try {
    const QUERY = `SELECT * FROM ${SCHEMA}.${TABLE}`
    const users = await client.query(QUERY);
    res.json(users);
  } catch (error) {
    console.log('ERROR in getAll ' + 'USER:', error);
    return res.status(500).json(error);
  }
};

//GET-ONE
exports.getOne = async (req, res, next) => {
  console.log('getOne: [GET] /users/:id');

  try {
    const QUERY = `SELECT * FROM ${SCHEMA}.${TABLE} WHERE id="${req.params.id}"`;
    const user = await client.query(QUERY);
    res.json(user);
  } catch (error) {
    console.log('ERROR in getAll ' + 'USER:', error);
    return res.status(500).json(error);
  }
};

//UPDATE-ONE.
exports.updateOne = async (req, res, next) => {
  console.log('updateOne: [PUT] /users/:id');

  try {
    const modUser = await client.update({
      table: TABLE,
      records: [
        {
          id: req.params.id,
          username: req.body.username,
          password: req.body.password,
          followers: req.body.followers,
        },
      ],
    });

    res.json(modUser);
  } catch (error) {
    res.status(500).json(error);
  }
};

//DELETE-ONE
exports.deleteOne = async (req, res, next) => {
  console.log('deleteOne: [DELETE] /users/:id');

  try {
    const QUERY = `DELETE FROM ${SCHEMA}.${TABLE} WHERE id="${req.params.id}"`;
    const deleteUser = await client.query(QUERY);
    res.json(deleteUser);
  } catch (error) {
    res.status(500).json(error);
  }
};
That's it! Now we are ready to create a Docker image, based on the application we have just created
DOCKER

Now the Docker Part!
In the main folder, create 3 files:
- Dockerfile
- docker-compose.yml
- .dockerignore (it starts with a dot)
the .dockerignore file:
.git
node_modules
npm-debug.log
the Dockerfile:
FROM node:14

EXPOSE 3000

WORKDIR /src

COPY package*.json ./

RUN npm install

COPY . .

CMD ["node", "app/index.js"]
The docker-compose.yml file:
version: "3.8"

services:
  app:
    container_name: hdb_backend
    image: francescoxx/hdb-example:0.0.1
    build:
      context: .
    ports:
      - "3000:3000"
    env_file:
      .env
replace the image "francescoxx/hdb-example:0.0.1" with an image name of your choice (example: mydockerhubuser/harperdb-example:1.0.0)
let's also create the .env file
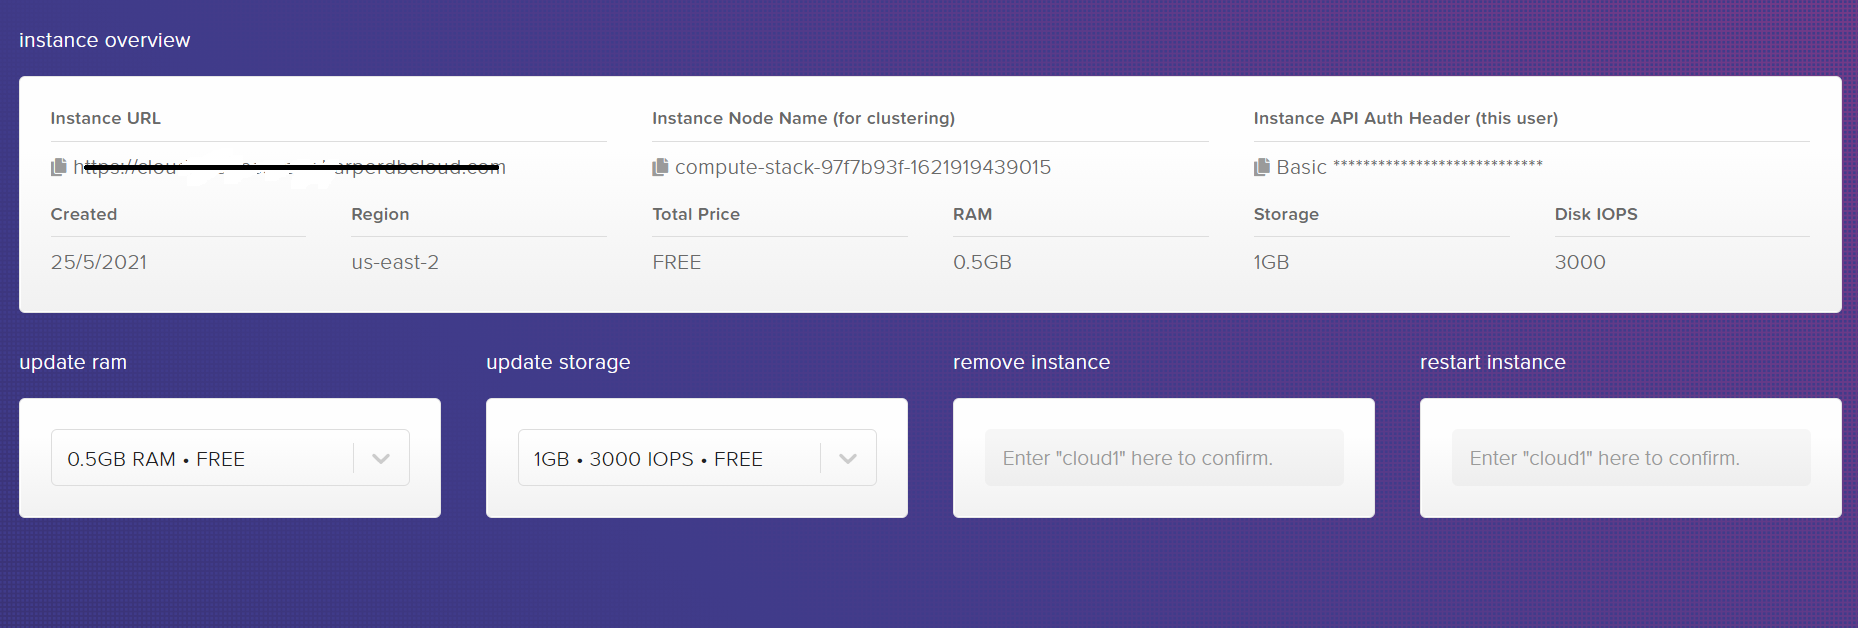
To retrieve the instance information you need in order to populate the .env file, visit Harper Studio and click on Config on the top right of the instance

Then you will see the information you need for your instance
Please note that a ".env-example" file is attached to the repository for convenience
Set the value to 3000.
# Replace with your values
INSTANCE_URL=<YOUR_INSTANCE_URL>
INSTANCE_USERNAME=<USERNAME>
INSTANCE_PASSWORD=<PASSWORD>
INSTANCE_SCHEMA=<SCHEMA>
PORT=3000
let's build the backend image
On the Terminal, type
docker-compose build
Run the backend service with
docker-compose up
POSTMAN / HarperDB UI

We will use Postman, but you can use a whenever tool you want
First of all, let's see if the service is up and running, by hitting the http://localhost:3000/dev/version endpoint with a get request:
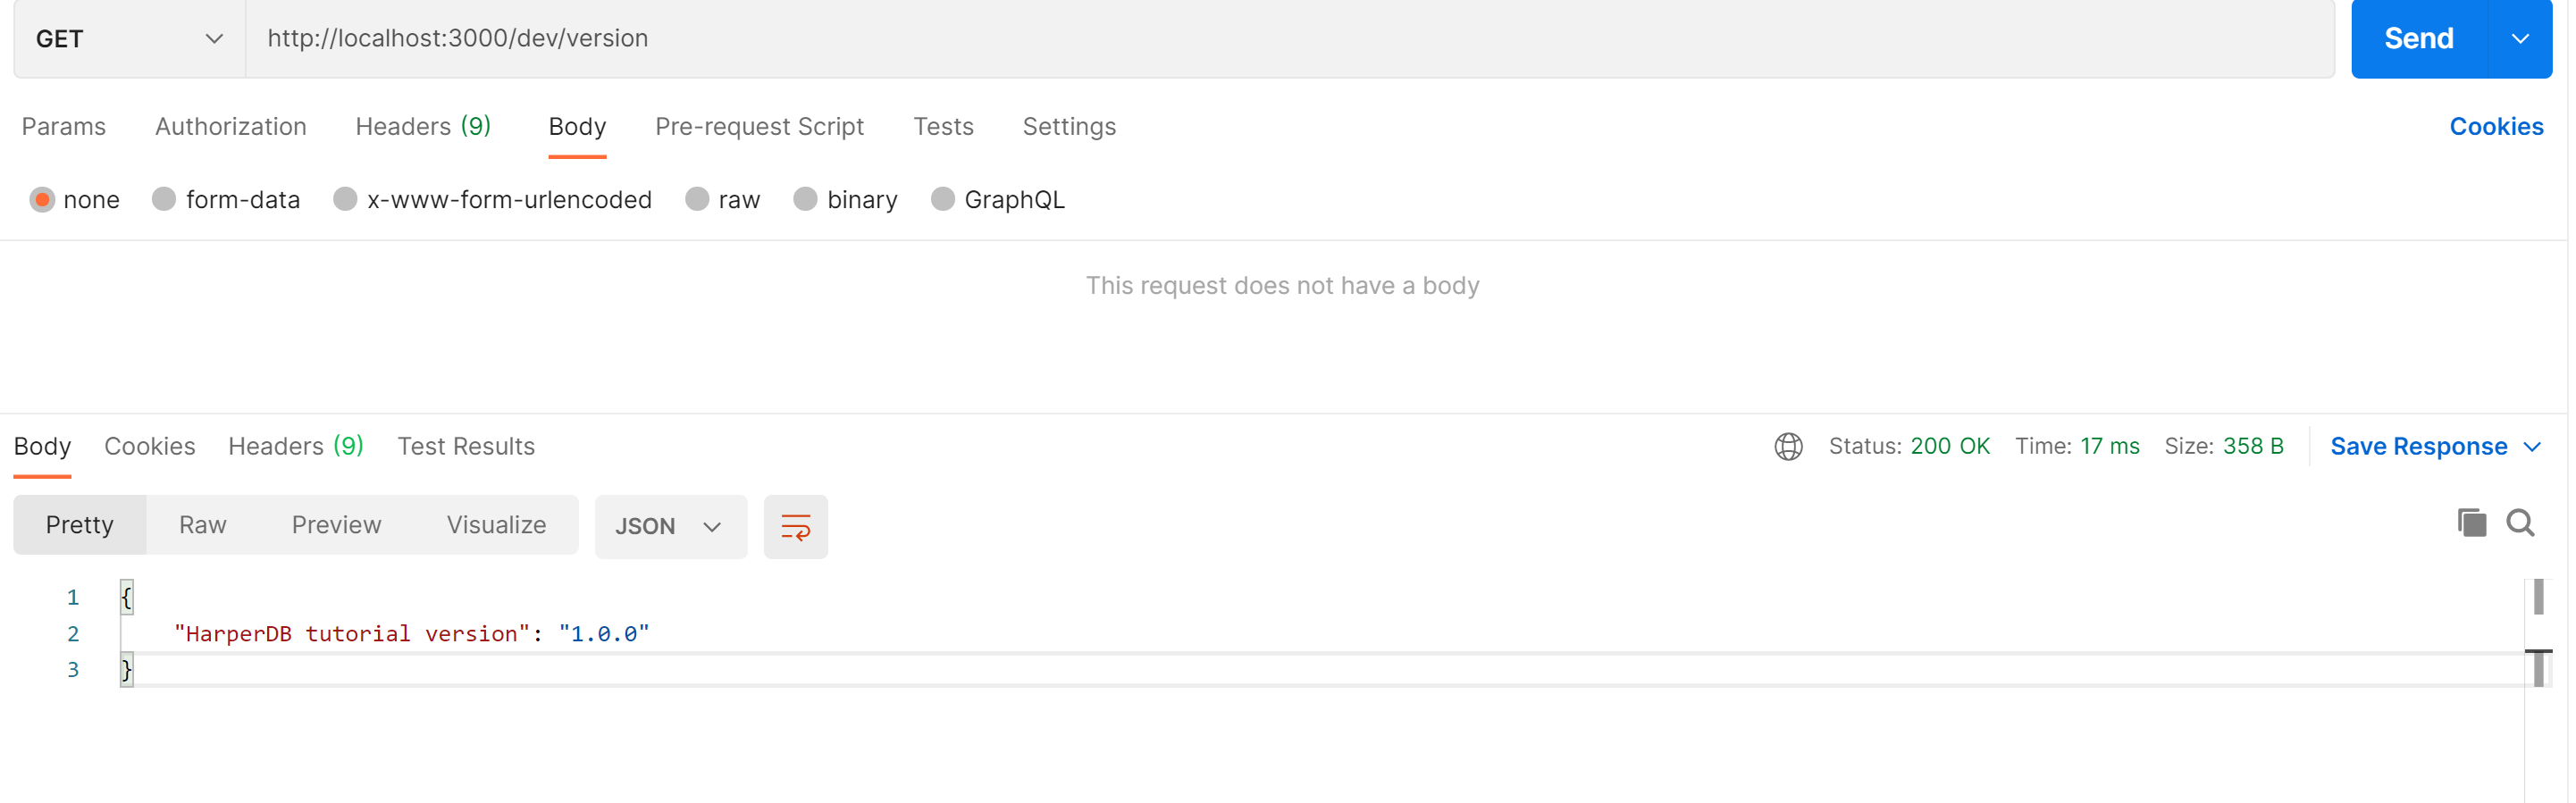
If we get this response, we can start creating our users on our HarperDB cloud instance
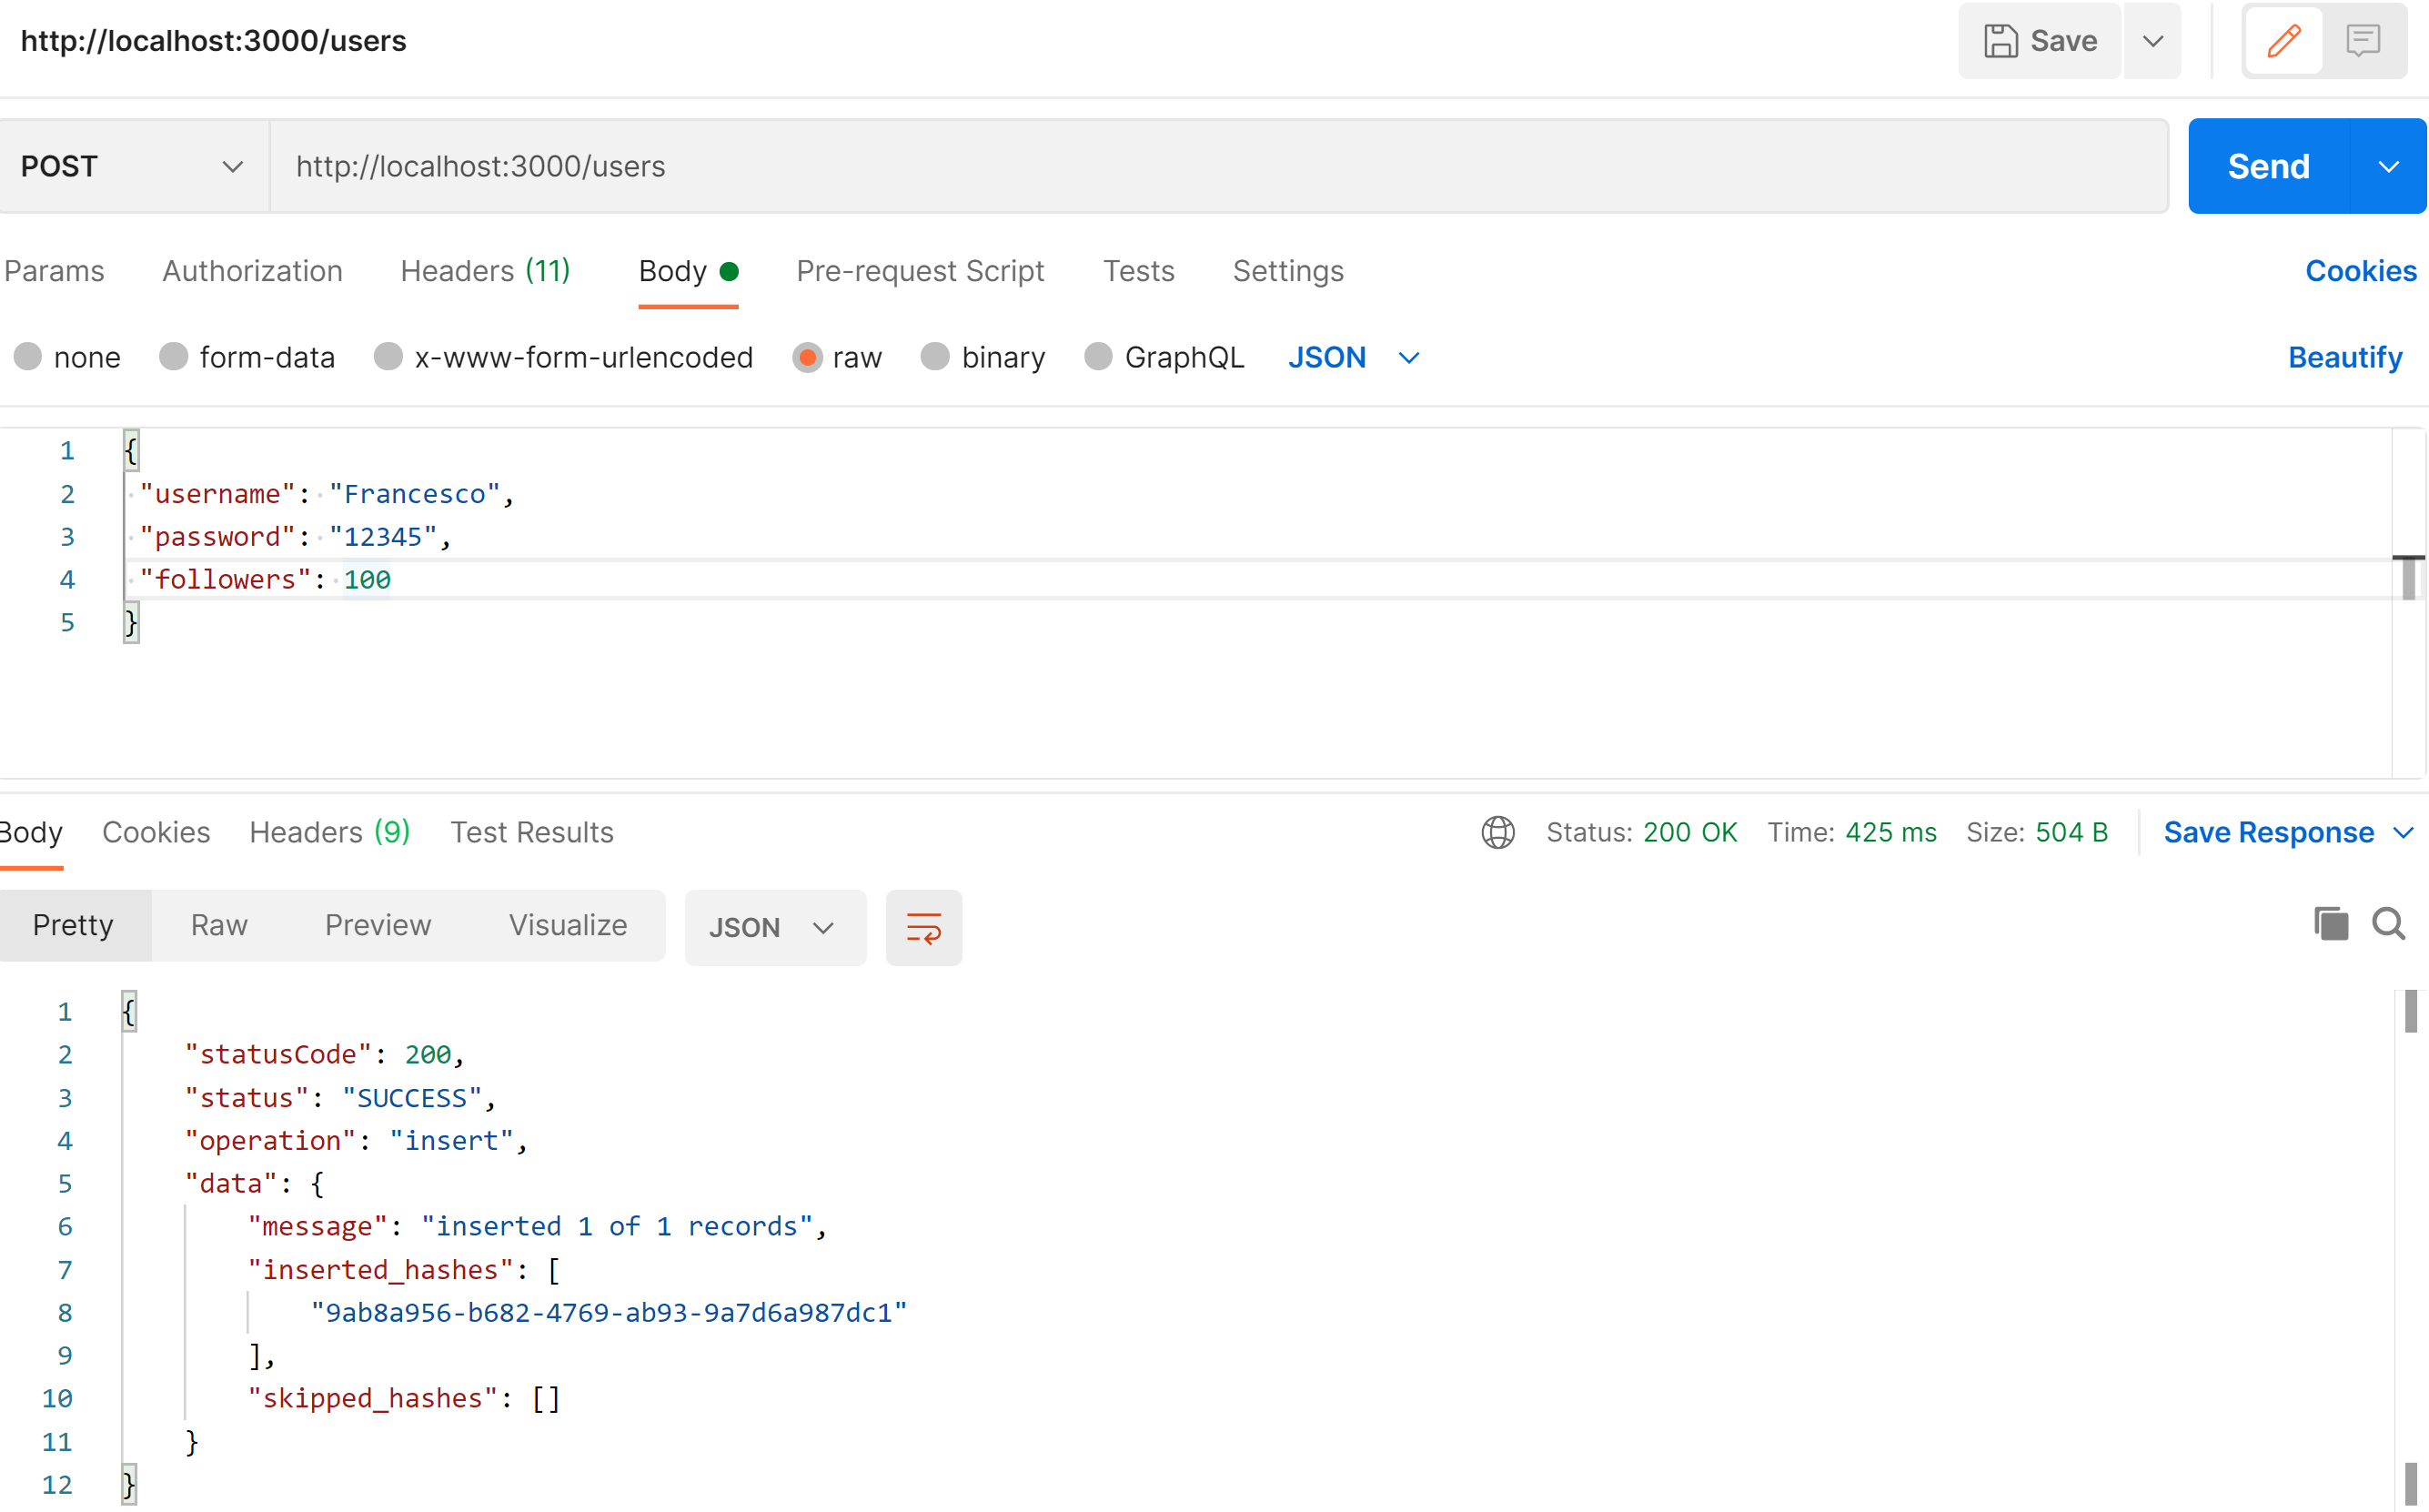
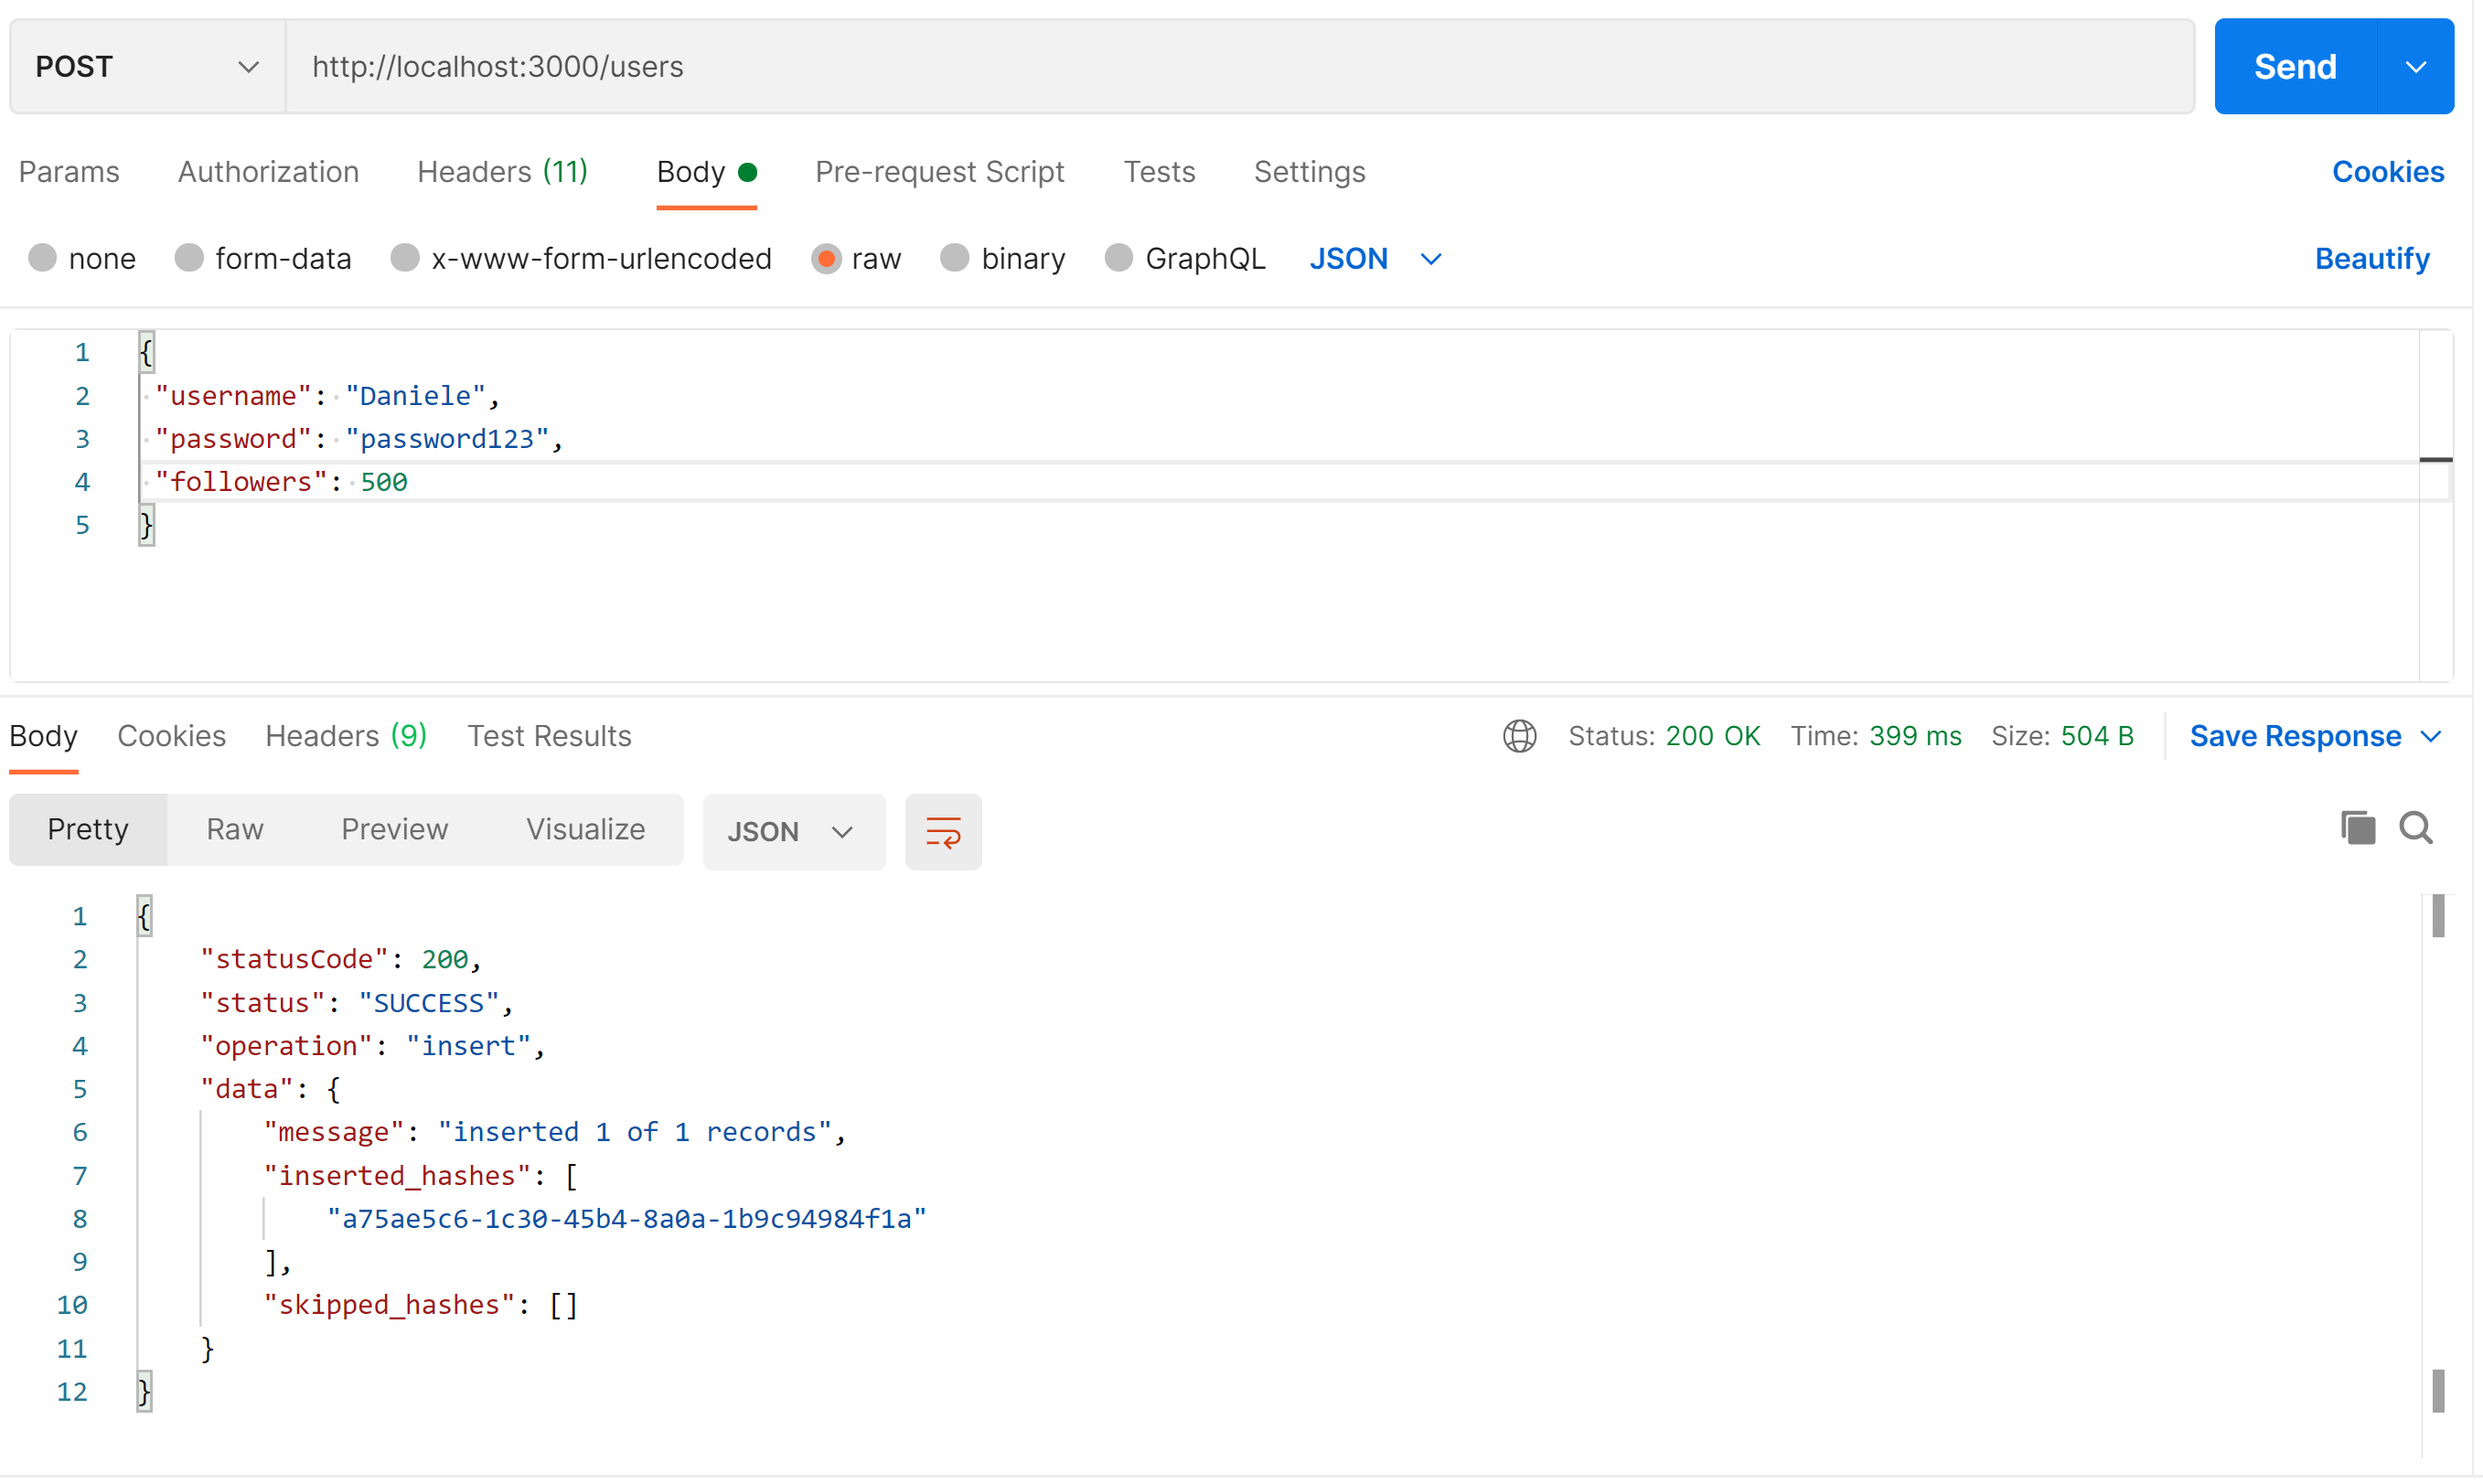
Let's start Creating some users using Postman, and sending our data in json format:
This will be a 'POST' Request, and data should be sent in raw json format, as showed in the picture below

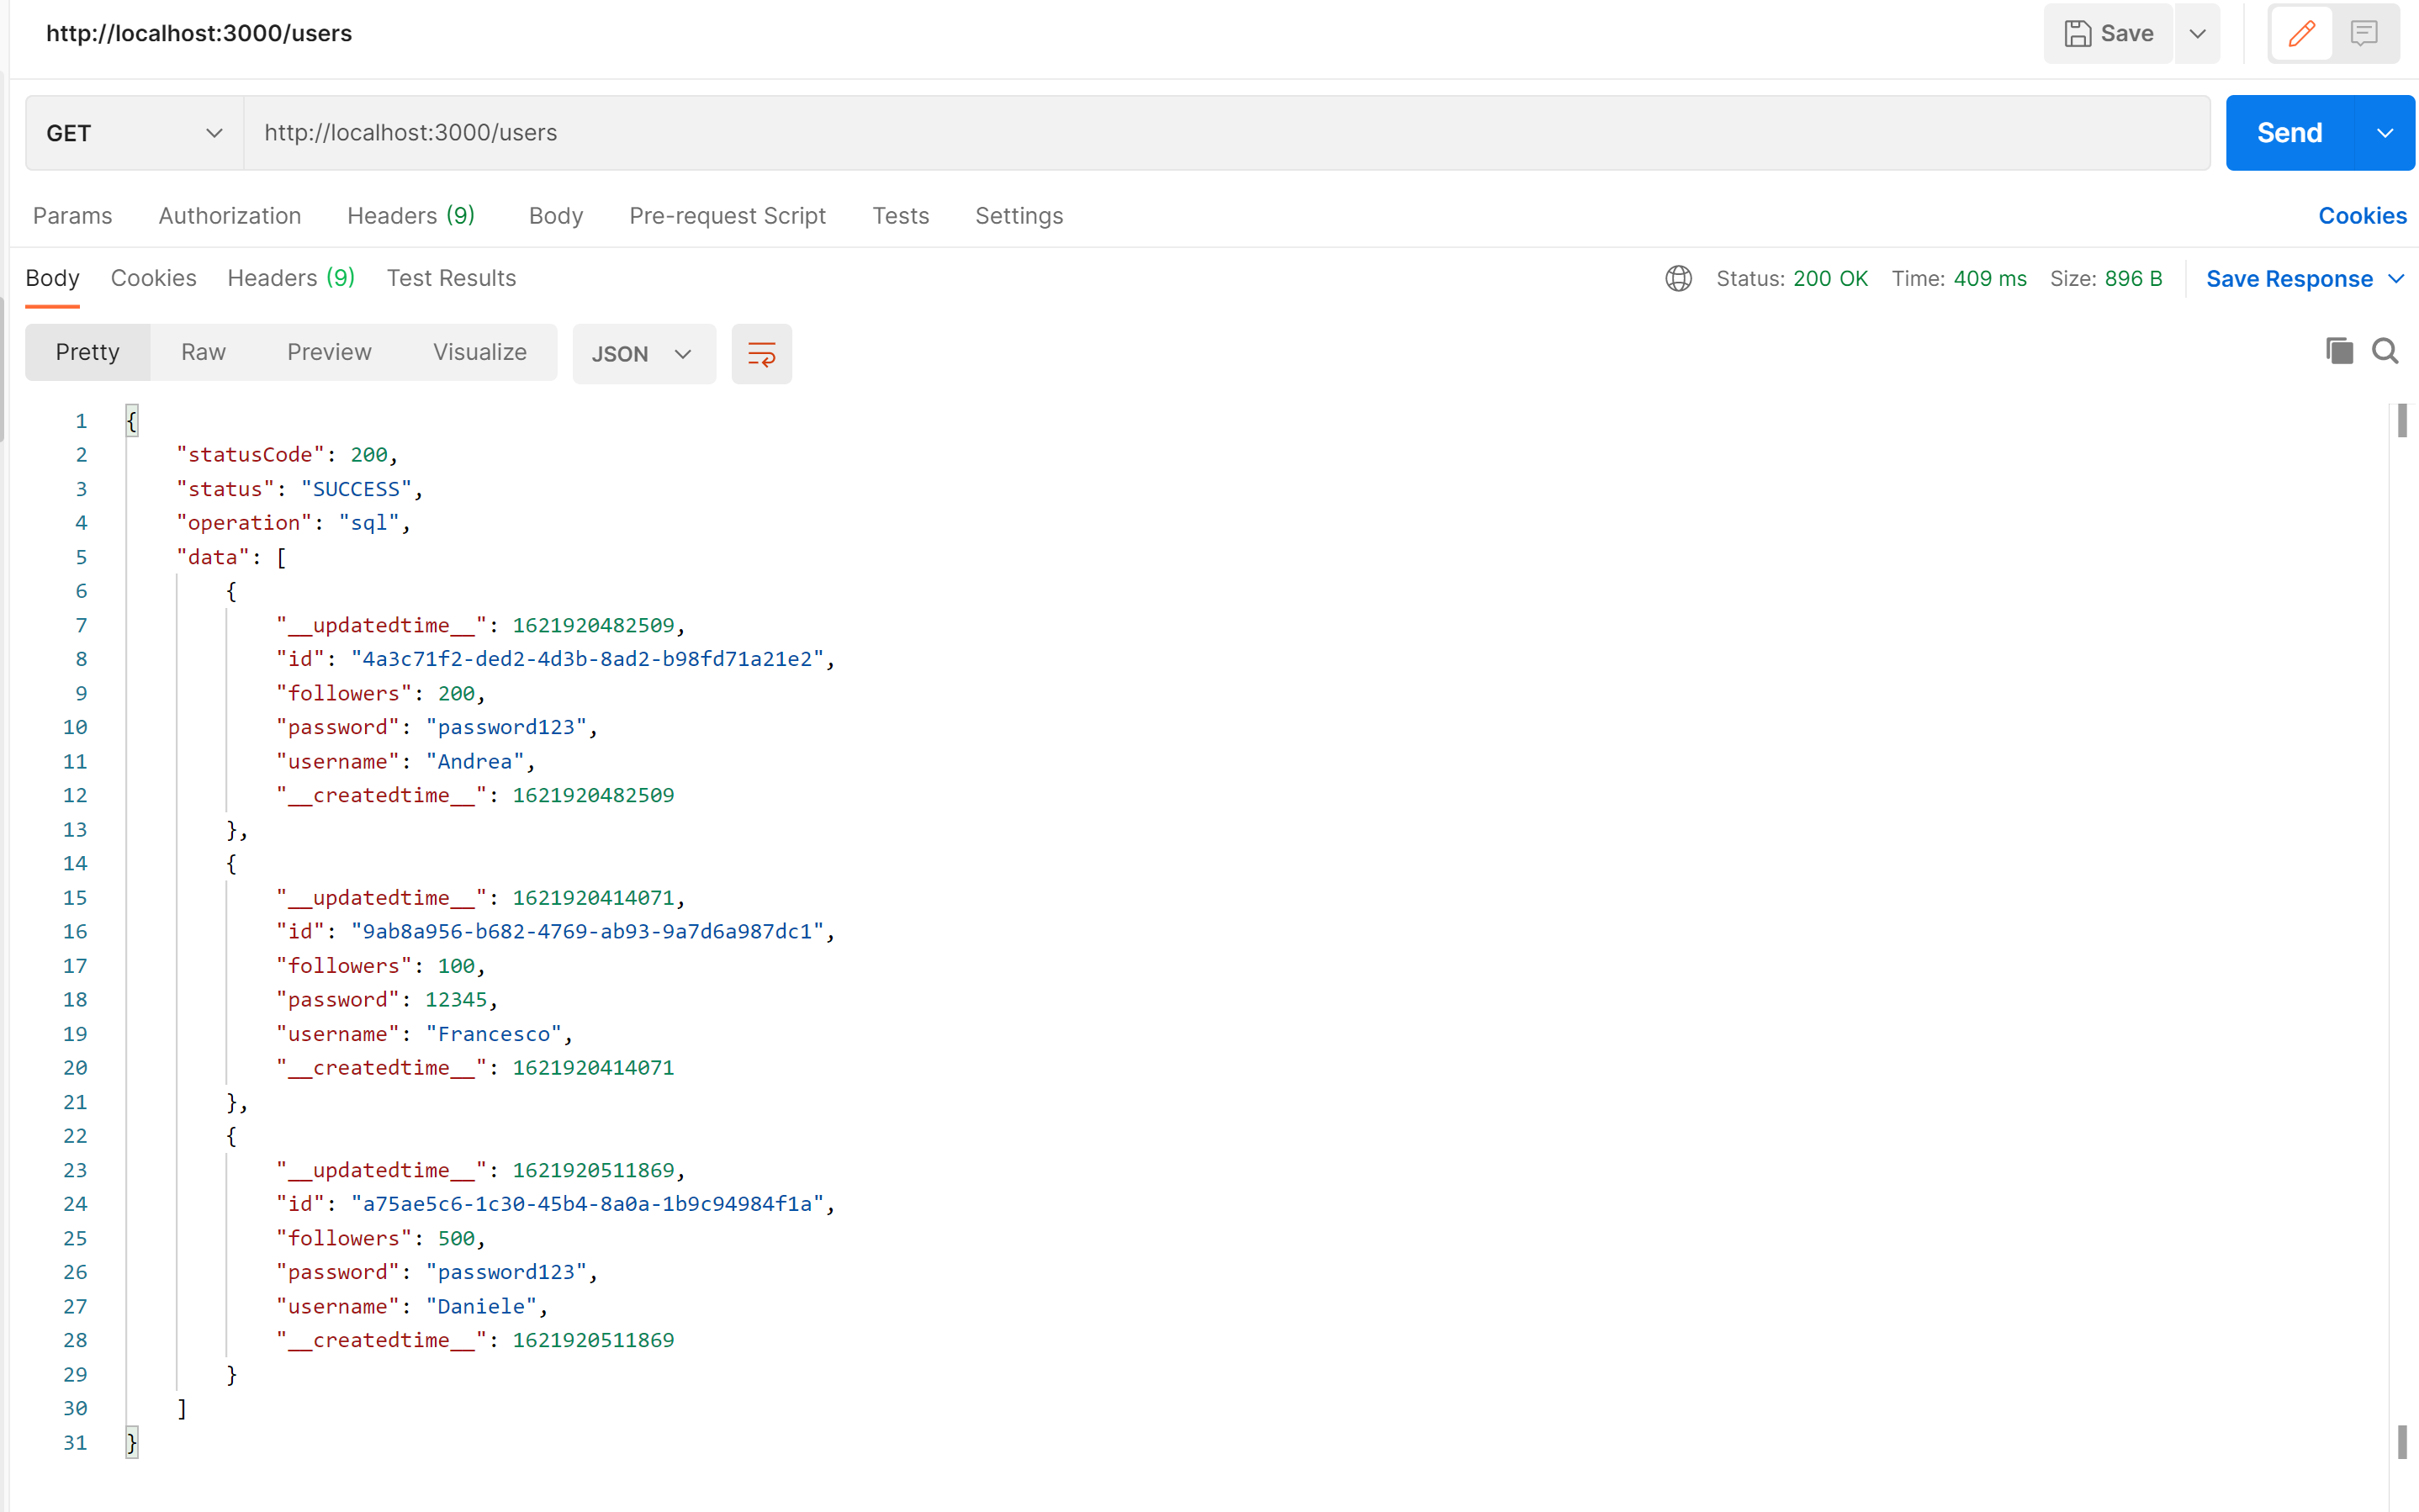
We can check all the users using Postman
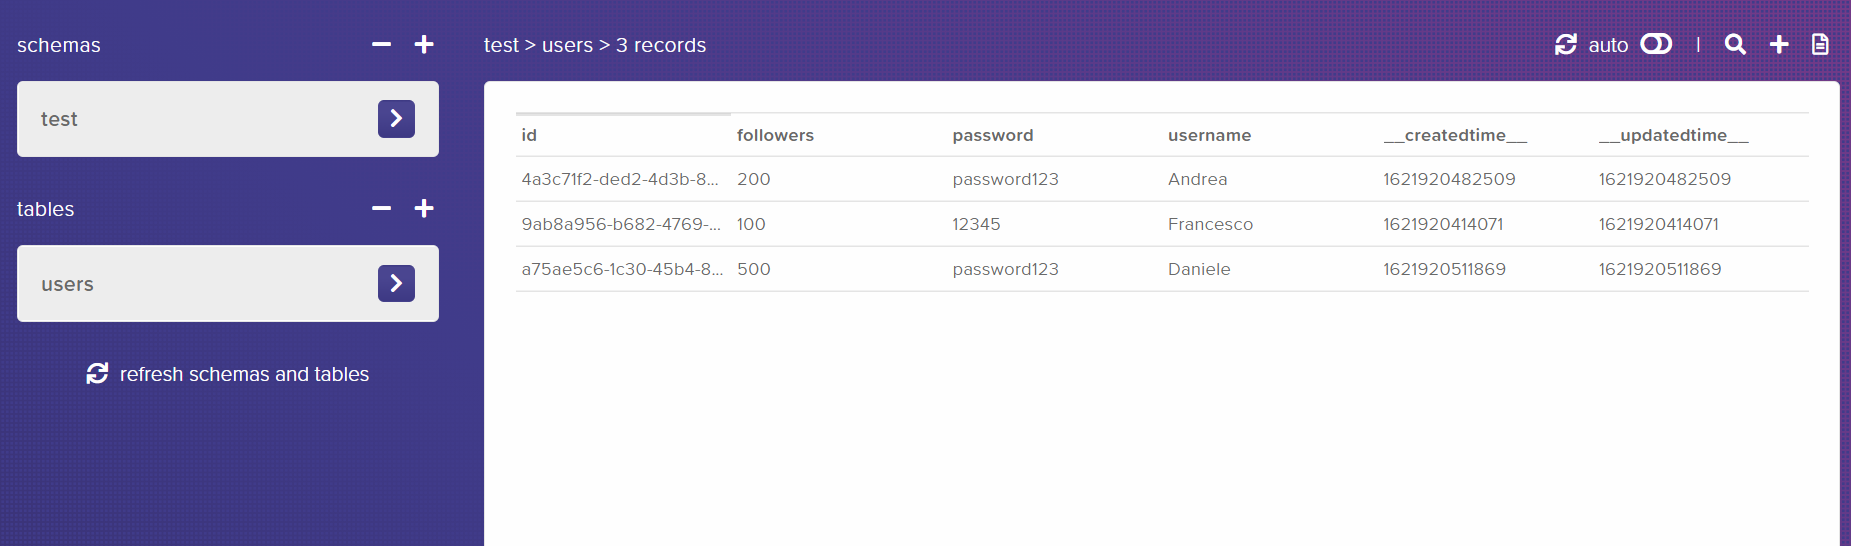
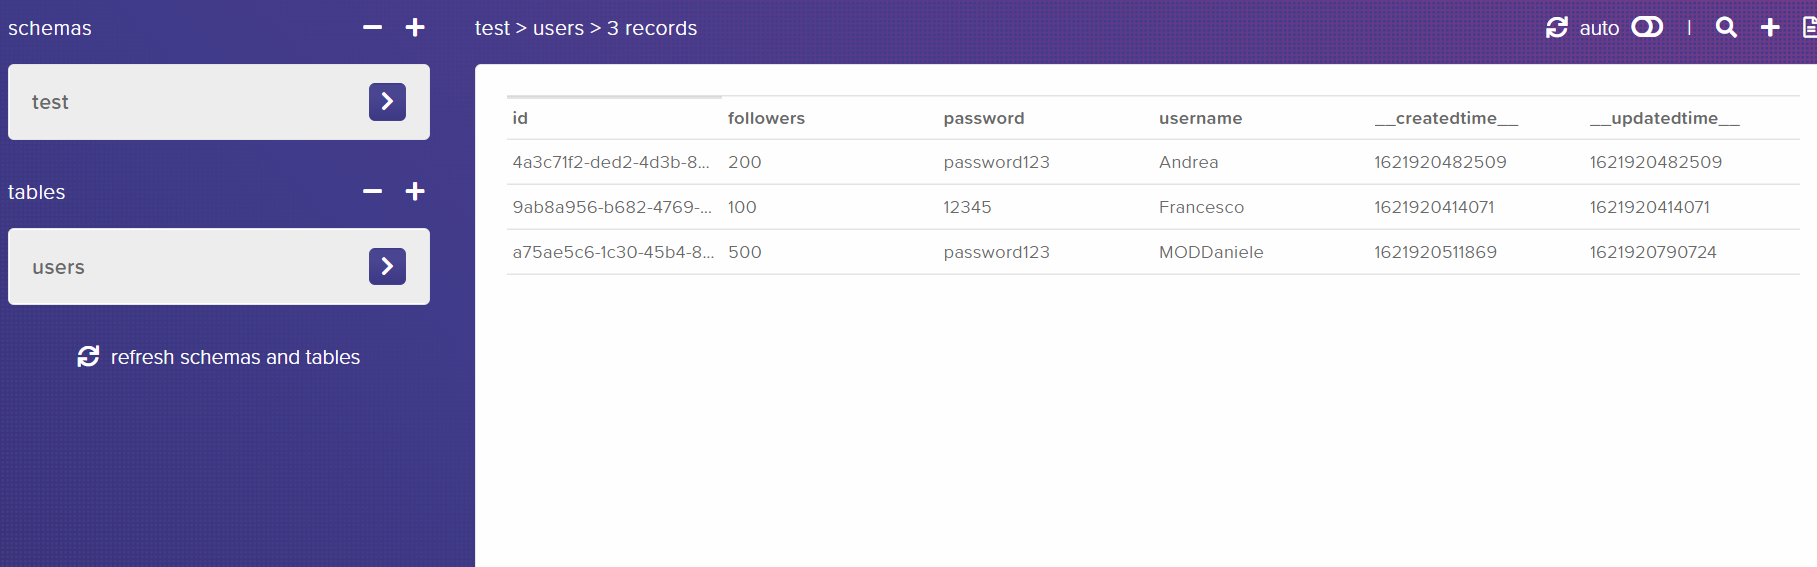
But the cool thing is that you can either check the db directly from HarperDB Studio! I like this feature!
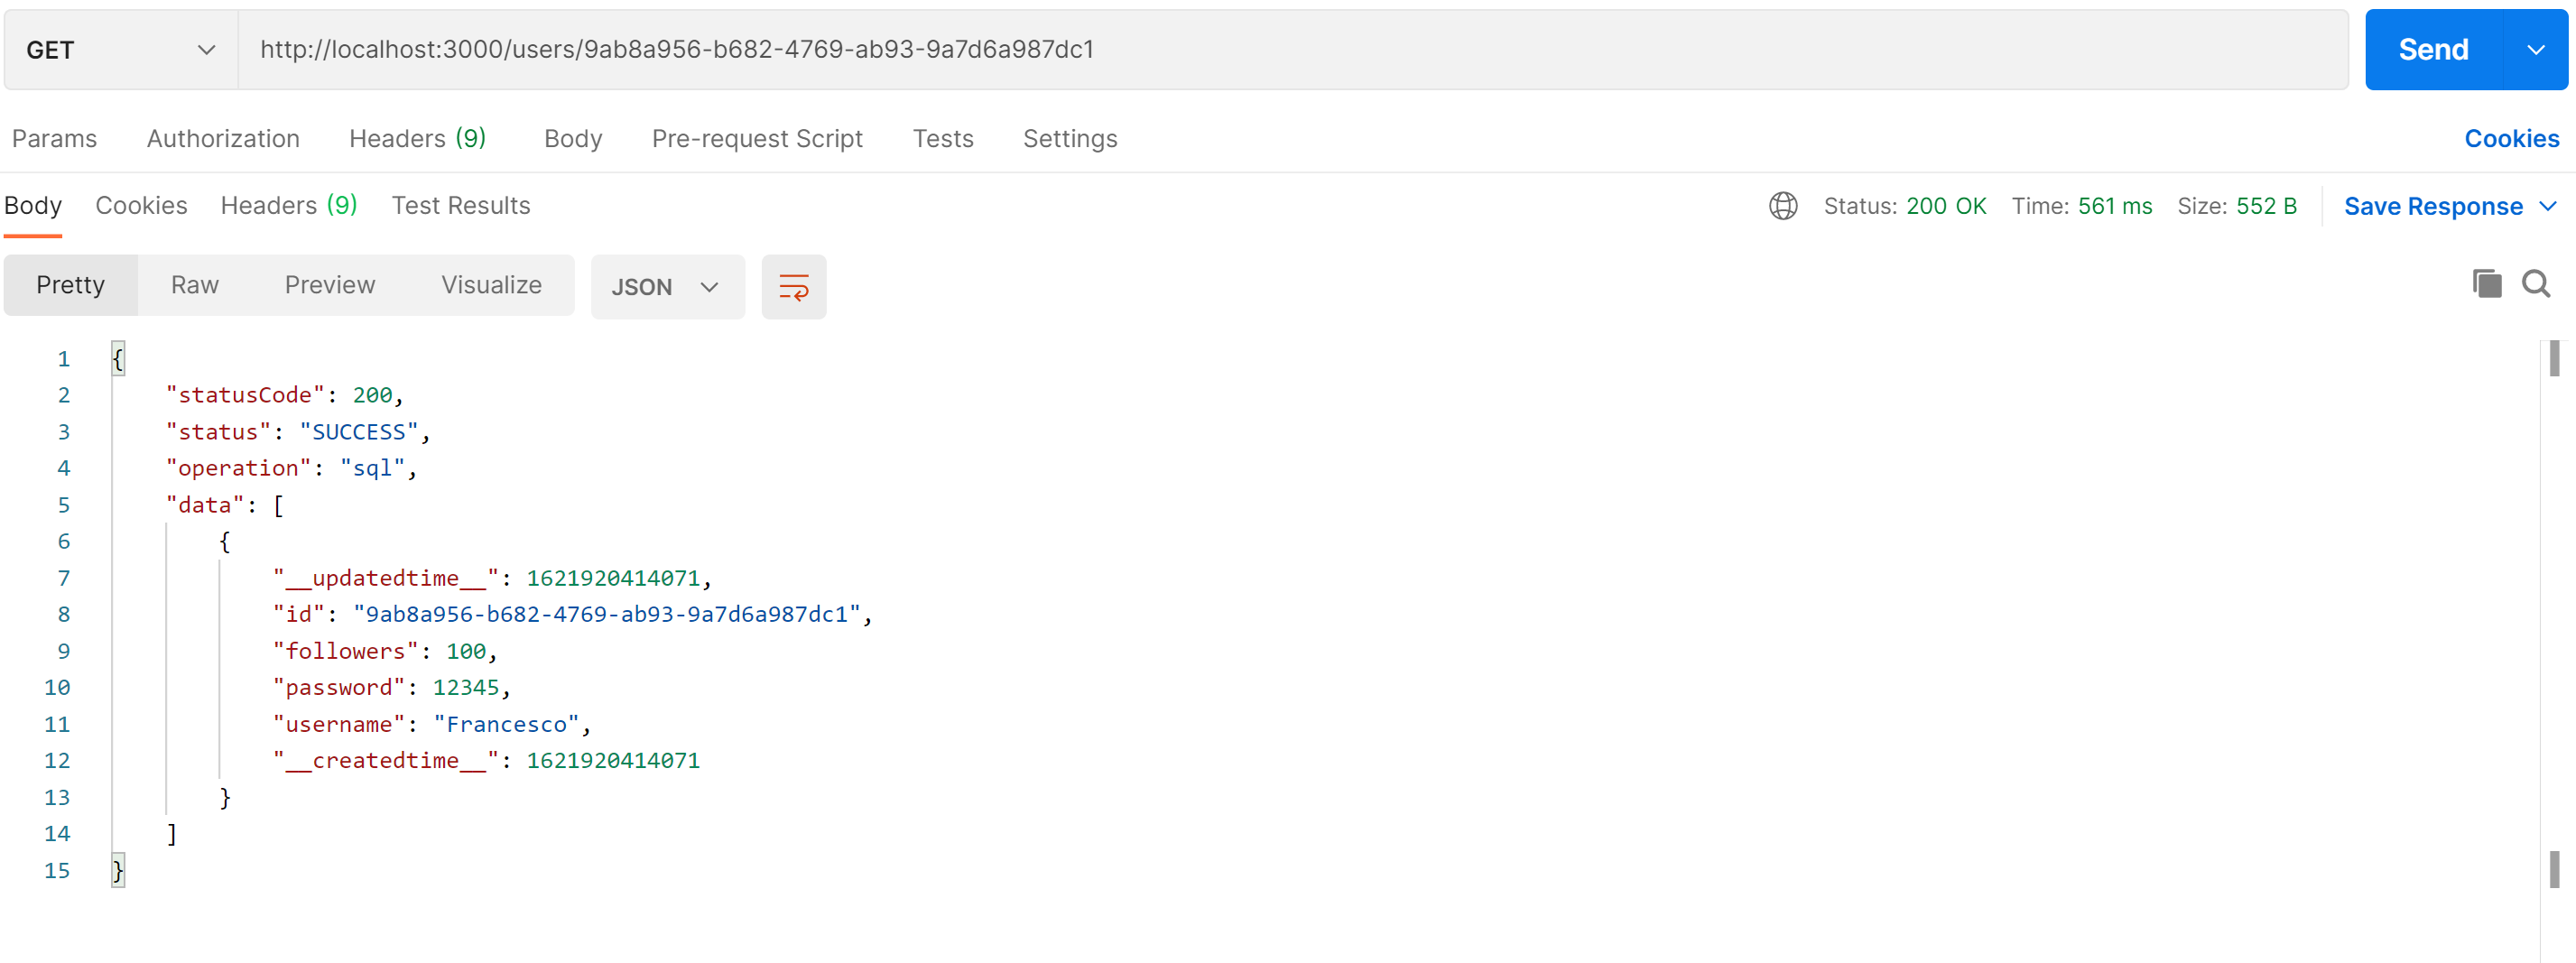
To check a single user, you can make a get request using the id of the user as a query parameter at the end of the URL
To modify an existing user, you can make a PUT request, using the id of the user in the query parameter, and the values you want to update
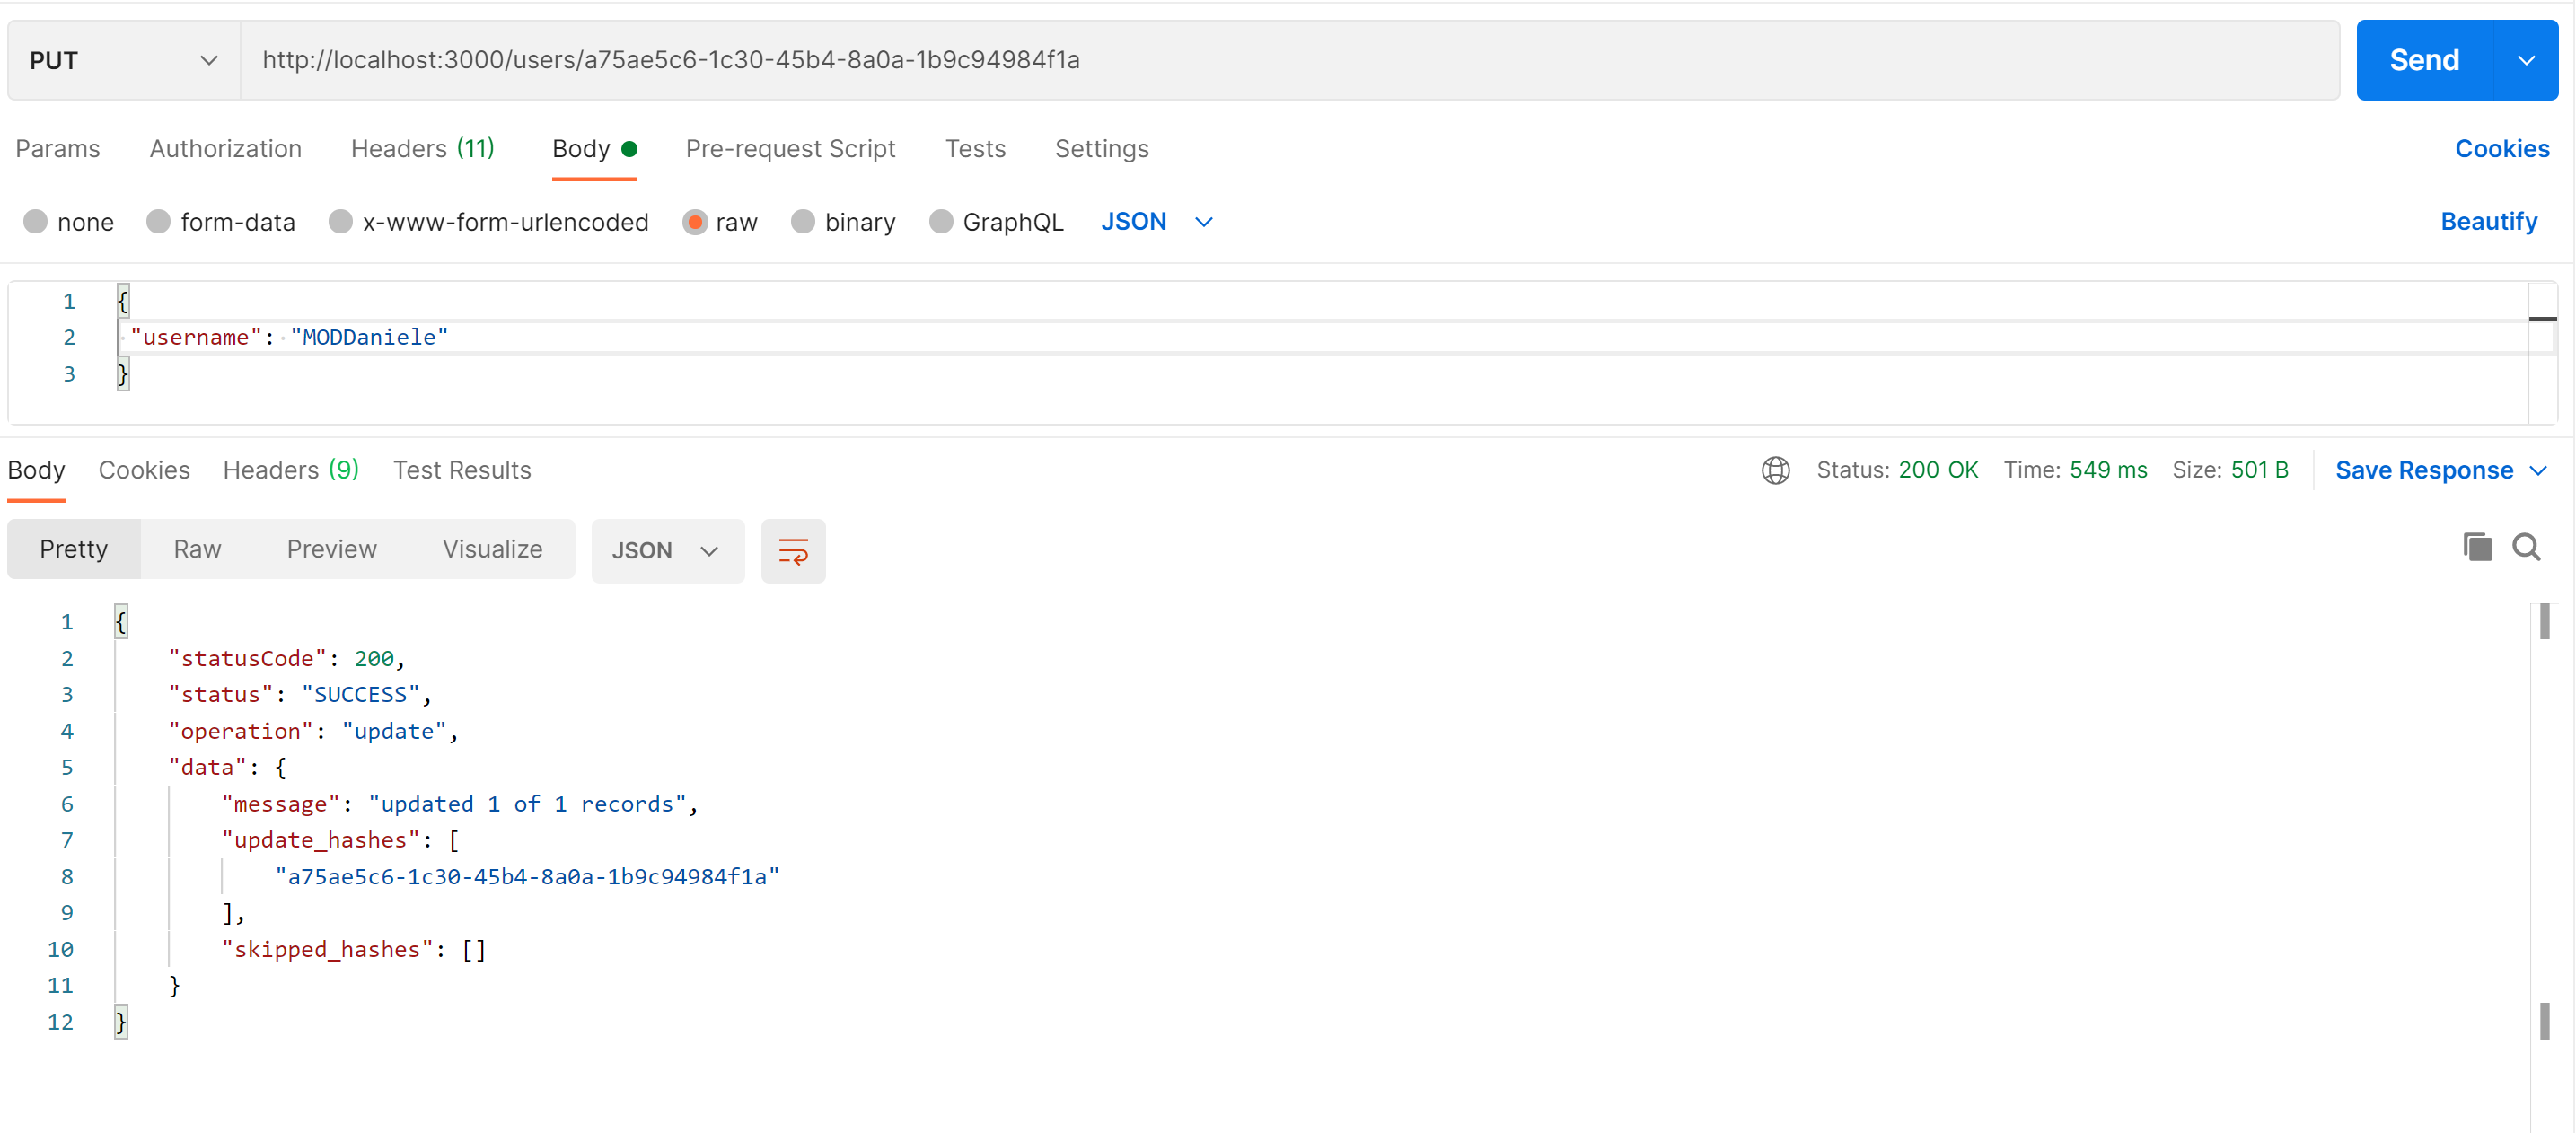
You can check the users in a more convenient way from the HarperDB UI
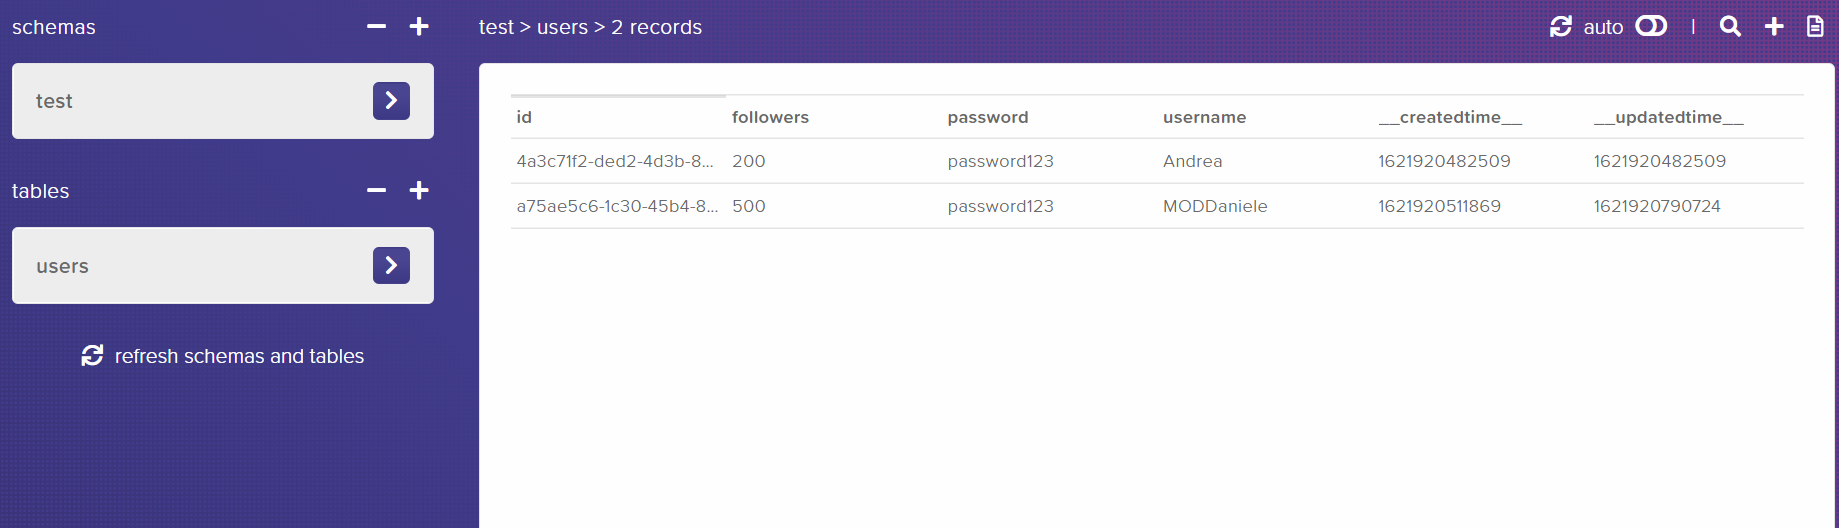
Finally, let's delete the user Francesco, with a DELETE request and adding the id as a query parameter at the end of the URL

As you can see, the user Francesco is no more there
Conclusion
This example is to show how simple is to get started using HarperDB cloud instance, monitor the DB entries. The UI can also be used to add/remove/delete values
To create a free HarperDB account, visit: https://studio.harperdb.io/sign-up
GitHub repository link: https://github.com/FrancescoXX/harperdb-crud-api